How to Set Up a Tactical Belt: Essentials and Configurations
Set up your tactical belt using the clock system with buckle at 12 o’clock for strategic positioning. Place your primary holster at 3 o’clock (right-handed) or 9 o’clock (left-handed) for ideal draw mechanics. Position medical gear at 6 o’clock for snag-free access. Apply the 60-30-10 weight distribution rule: 60% heavy gear near hips, 30% medium on sides, 10% lighter items on lower back. This configuration prevents gear rotation during movement and maintains balance throughout operations.
We are supported by our audience. When you purchase through links on our site, we may earn an affiliate commission, at no extra cost for you. Learn more. Last update on 16th December 2025 / Images from Amazon Product Advertising API.
Notable Insights
- Choose 1000D nylon belts with metal buckles for durability and secure MOLLE attachment points for holsters and pouches.
- Position primary holster at 3 o’clock, medical gear at 6 o’clock, and magazines at 9 o’clock using clock system.
- Apply 60-30-10 weight distribution rule: 60% heavy gear near hips, 30% medium on sides, 10% light on back.
- Include essential categories: retention holster, spare ammunition, medical supplies, multi-tools, and backup lighting with secure mounting systems.
- Test configuration through dynamic movement drills including sprinting, prone drops, and obstacle navigation to identify weaknesses.
Selecting the Right Belt and Components
When selecting a tactical belt, the foundation material determines your system’s overall performance and longevity.
Nylon remains the top choice for most operators due to its exceptional strength-to-weight ratio and resistance to water and mildew. High-denier nylon (1000D) provides maximum durability for heavy gear loads.
Leather offers traditional comfort but lacks adaptability in extreme conditions.
Belt materials directly impact load-bearing capacity and weather resistance. Consider your operational environment when choosing between synthetic and natural options.
Buckle types greatly affect tactical functionality.
Metal buckles deliver superior strength under stress but add weight. Quick-release buckles enable rapid deployment and removal—critical for time-sensitive situations. Modularity in tactical setups allows for customization based on specific mission requirements. Plastic buckles offer lightweight convenience for everyday carry applications.
Choose buckle material based on mission demands: metal for maximum strength, quick-release for rapid response, plastic for lightweight daily use.
Match your buckle selection to your mission requirements and gear weight demands. Proper attachment points ensure your holsters and pouches remain secure during dynamic movement and tactical operations.
Strategic Gear Placement and Positioning
You’ve selected your belt and components, but proper placement determines whether your tactical setup enhances or hinders your performance.
Strategic positioning follows the clock system, with your belt buckle at 12 o’clock serving as the reference point for all gear placement decisions.
Weight distribution, frequency of use, and mission requirements guide where each piece of equipment sits on your belt to maximize accessibility while maintaining operational mobility. Your primary holster should be positioned at 2-3 o’clock for right-handed users or 9-10 o’clock for left-handed users to ensure optimal draw mechanics and comfort during extended wear.
A substantial, thick belt provides the necessary foundation to manage the weight of multiple components without compromising stability during movement.
Consider dual power sources for any electronic equipment mounted on your tactical belt to ensure reliable operation during extended missions when access to charging may be limited.
Clock Position Fundamentals
Strategic gear placement on your tactical belt follows a clock position system that maximizes accessibility while maintaining operational efficiency. The 3 o’clock position serves your dominant hand holster, while 6 o’clock accommodates medical pouches like IFAKs. Your support hand accesses magazines at 9 o’clock effectively.
Clock position advantages include intuitive placement that builds muscle memory and reduces retrieval time under stress. However, clock position challenges arise from individual body mechanics and mission requirements that may demand customized arrangements.
- 3 o’clock: Primary holster placement for ideal draw speed
- 6 o’clock: Medical gear positioning for snag-free access
- 9 o’clock: Magazine storage for support hand retrieval
- Belt buckle offset creates additional MOLLE space forward
- Weight distribution around belt prevents gear rotation during movement
Weight Distribution Balance
Proper weight distribution transforms your tactical belt from an uncomfortable burden into a balanced load-bearing system that enhances rather than hinders your performance.
Apply the 60-30-10 rule for weight distribution planning: place 60% of heavy gear near your hips, 30% of medium equipment on the sides, and 10% of lighter items on your lower back.
Keep weighty items close to your body to minimize pendulum effects and reduce fatigue. Avoid clustering heavy gear on one side, which strains muscles and compromises agility.
For balance maintenance during extended wear, consider suspenders to offload 20% of belt weight to your shoulders.
Position frequently accessed gear within quick-reach zones while maintaining overall symmetry around your belt’s circumference.
Mission-Specific Equipment Placement
Mapping out your gear placement transforms a tactical belt from a simple accessory into a mission-efficient tool that directly impacts your operational effectiveness. Your mission priorities determine which equipment earns real estate on your belt. Urban operations demand minimal loadout focusing on magazines and breaching tools, while reconnaissance missions require navigation and surveillance gear for enhanced situational awareness.
Strategic positioning follows the clock method for ideal access. Place your primary holster at 2-3 o’clock (right-handed) or 9-10 o’clock (left-handed) for natural draw mechanics. Position magazine pouches adjacent to your holster for seamless reloads.
- Reserve 6 o’clock for lightweight items like dump pouches
- Avoid the 12 o’clock buckle area completely
- Place utility pouches at 4-5 and 7-8 o’clock positions
- Evaluate gear necessity against mission-specific requirements
- Test configurations under dynamic movement conditions
Essential Equipment Categories for Your Setup
When building your tactical belt setup, you’ll need to organize your gear into five core categories that form the foundation of any effective tactical loadout.
Weapons include your primary sidearm in a retention holster with quick-release mechanisms, plus backup Weapons like knives or expandable batons.
Position these for natural draw angles without movement interference.
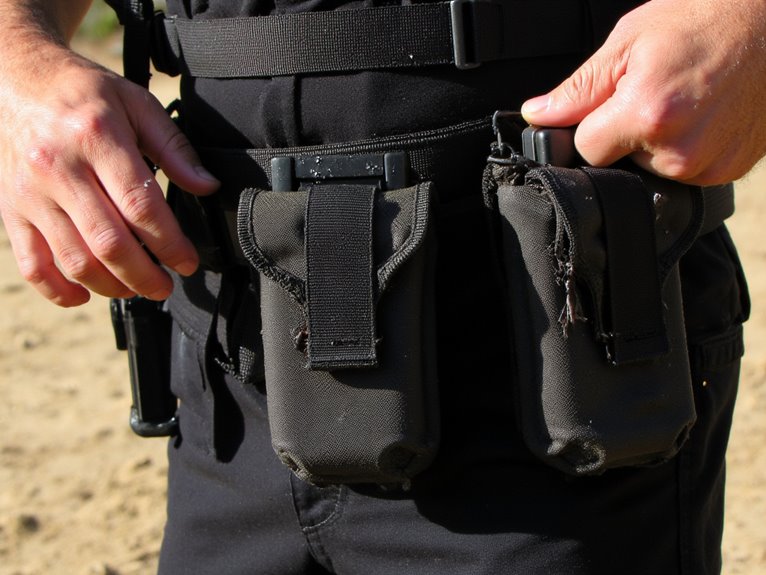
Spare ammunition requires magazine pouches with retention systems, placed for efficient reload motions.
Weather-resistant pouches protect rounds from environmental damage.
Medical equipment encompasses tourniquets, hemostatic agents, and trauma supplies in modular pouches.
Position near your non-dominant hand for immediate access.
Tools cover multi-tools, tactical flashlights, and communication devices that enhance operational capability.
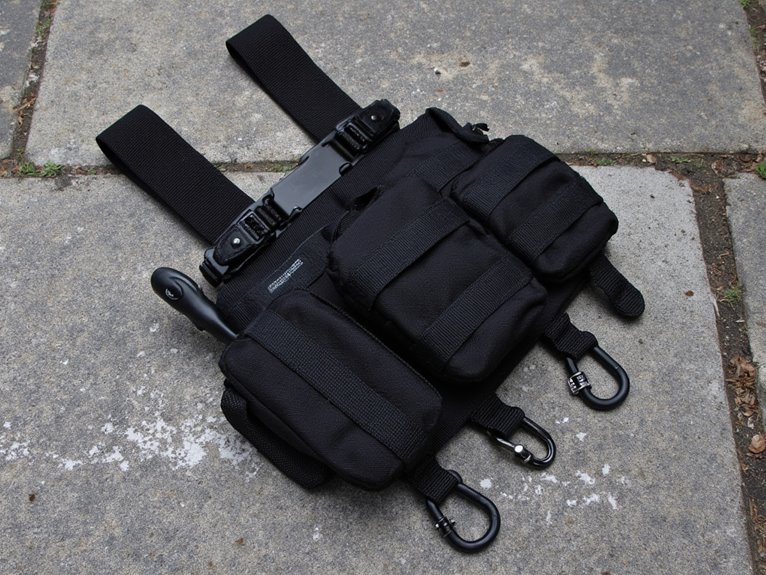
Attachment systems utilize MOLLE compatibility and cobra buckles for secure, adaptable mounting.
Strategic gear redundancies guarantee mission continuity if primary equipment fails.
For optimal sidearm carry, consider appendix sidecar holsters that combine pistol retention with integrated magazine holders for streamlined access and enhanced concealment.
Comfort and Functionality Optimization
Although your tactical belt can carry the most essential gear, it won’t serve its purpose if you can’t wear it comfortably for extended periods.
Proper comfort optimization directly impacts belt longevity and operational effectiveness.
Select belts featuring neoprene lining or integrated padding materials to eliminate pressure points during extended wear. These materials distribute weight evenly across your waist while providing cushioning against heavy equipment loads.
Breathable fabrics with moisture-wicking properties prevent heat buildup and skin irritation during demanding operations.
Essential comfort features include:
- Reinforced cores that prevent twisting and maintain structural integrity under load
- Smooth edge finishes that minimize chafing and skin irritation
- Flexible construction allowing natural body movement without compromising support
- Shock-absorbing elements reducing impact stress on hips and lower back
- Sweat-resistant materials ensuring consistent performance in harsh environments
When selecting tactical gear, prioritize robust materials that can withstand the rigors of outdoor conditions while maintaining comfort throughout extended use.
Testing Your Configuration Through Training
Once you’ve assembled your tactical belt, you’ll need to test its performance through structured training exercises that simulate real-world conditions.
Dynamic movement drills, position accessibility testing, and stress scenario evaluation will reveal critical flaws in your setup before they become operational liabilities.
These three testing methods work together to validate your gear placement decisions and identify necessary adjustments for peak performance.
Dynamic Movement Drills
Five essential movement patterns will expose every weakness in your tactical belt configuration: sprinting, lateral shifts, prone drops, rapid direction changes, and obstacle navigation.
These drills test your belt’s movement efficiency under realistic conditions while identifying gear that shifts, bounces, or interferes with performance.
Start with 50-yard sprints to assess bouncing and shifting. Progress to lateral shuffles that stress belt stability during side-to-side adjustments.
Prone drops reveal whether your gear snags or creates pressure points during ground shifts. Rapid pivots test your belt’s agility enhancement capabilities during directional changes.
- Run figure-eight patterns around cones to test lateral movement and pivoting
- Practice low crawls to identify gear interference during ground navigation
- Execute breakaway belt drills for emergency separation scenarios
- Perform multi-level movements combining standing, crouching, and prone positions
- Conduct loaded carries while wearing your complete tactical belt setup
Position Accessibility Testing
Why does a perfectly configured tactical belt fail during critical moments? Your gear placement works fine standing upright, but accessibility challenges emerge when you’re seated in vehicles, prone behind cover, or moving through tight spaces. You must test every position where you’ll operate.
Start with ergonomic adjustments during seated positions. Your holster might dig into your ribs or become unreachable. Test drawing from various seated angles and adjust accordingly.
| Position | Primary Challenge | Required Adjustment |
|---|---|---|
| Vehicle seated | Hip clearance issues | Forward cant angle |
| Prone shooting | Ground interference | Higher belt placement |
| Kneeling cover | Gear compression | Repositioned pouches |
| Climbing obstacles | Snagging hazards | Streamlined profile |
| Confined spaces | Limited reach angles | Ambidextrous access |
Document each position’s unique requirements and modify your setup to guarantee consistent access across all operational postures.
Stress Scenario Evaluation
When your tactical belt setup faces the crucible of high-stress scenarios, the configuration that seemed perfect during casual range time often reveals critical flaws.
Stress impact dramatically affects muscle memory and fine motor skills, making previously simple gear access suddenly clumsy or impossible. You’ll need thorough evaluation protocols that replicate operational conditions.
- Conduct high-intensity interval training while performing timed equipment retrievals to measure cognitive load effects
- Execute force-on-force scenarios with multiple movement phases to test gear stability under dynamic conditions
- Navigate confined spaces and physical obstacles to evaluate belt function under operational constraints
- Perform equipment failure drills requiring rapid contingency tool deployment from your belt configuration
- Monitor physiological stress markers during extended load-bearing exercises to assess endurance limitations
These evaluations expose weaknesses invisible during static testing.
Advanced Setup Tips and Customization Options
Once you’ve mastered the basics of tactical belt setup, strategic gear placement becomes the foundation of an effective loadout. Position frequently accessed items like pistol magazines on your dominant side for rapid retrieval.
Advanced retention techniques include selective use of bungee cords and retention straps on critical gear to prevent loss during dynamic movement.
Modular attachment systems offer maximum customization flexibility. Integrate magnetic mounts near belt buckles for loaded magazine disposal as tactical instructors recommend.
Low-profile stacking solutions minimize bulk when layering multiple pouches becomes necessary. MOLLE-compatible add-ons like radio holders, dump pouches, and taser holsters expand functionality without compromising mobility.
Test your configuration through dynamic drills including sprints, kneeling exercises, and weapon draws. Adjust placement following practical evaluation to eliminate interference between equipment and enhance accessibility.
When selecting appendix carry holsters for your tactical belt system, prioritize secure retention mechanisms and smooth draw capabilities to maintain both safety and rapid accessibility during operations.
On a final note
You’ve now mastered the fundamentals of tactical belt configuration. Your setup should balance mission requirements with personal ergonomics. Test your configuration regularly through realistic training scenarios. Adjust placement based on draw times and comfort feedback. Remember that belt systems evolve with experience and changing needs. Quality components and proper positioning will serve you reliably when it matters most. Continue refining your setup through consistent practice and honest performance evaluation.