
How to Set Up a Wildlife Camera Without Spooking Animals
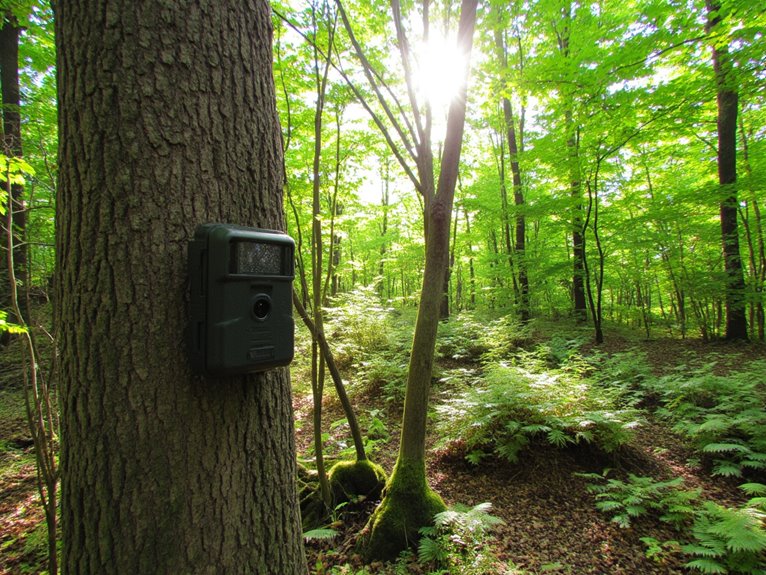
Position your camera 4-5 feet high along natural wildlife trails near water sources, ensuring clear sight lines without tall grass obstructions. Eliminate human scent using odor-eliminating sprays and gloves when handling equipment. Set motion sensitivity to balance trigger responsiveness with false alarms-most cameras detect movement 50-100 feet away. Test walk-through verification before deployment to confirm proper detection range and image quality. Use wide apertures (f/1.8-f/5.6) for low-light capture and minimize site visits through cellular monitoring for ideal results.
We are supported by our audience. When you purchase through links on our site, we may earn an affiliate commission, at no extra cost for you. Learn more. Last update on 7th January 2026 / Images from Amazon Product Advertising API.
Notable Insights
- Position cameras 4-5 feet high on natural wildlife trails with partial foliage concealment and clear sight lines.
- Use odor-eliminating sprays and handle equipment with gloves to minimize human scent that alters animal behavior.
- Limit visits to camera sites and utilize cellular cameras for remote monitoring to reduce human presence.
- Conduct walk tests to verify motion sensitivity and avoid false triggers from vegetation or environmental factors.
- Clear vegetation from sensor paths and secure cameras with lockable straps on sturdy trees for stability.
Choosing the Perfect Camera Location and Height
Where you position your wildlife camera determines whether you’ll capture stunning wildlife footage or endless hours of empty forest.
Target natural wildlife trails, game paths, and edge habitats between fields and woods where animals naturally travel. Position cameras near water sources like ponds or creeks for consistent activity.
Mount cameras at 4-5 feet for general wildlife coverage. Deer require 3-5 foot placement, with 4 feet being ideal. Lower small animal cameras to 1-3 feet for raccoons and foxes. Larger game like elk needs 5-6 foot mounting height for full-frame shots.
Choose locations with clear sight lines while maintaining partial foliage concealment. Use natural features like logs to position cameras slightly off main trails. Avoid obstructions like tall grass that can interfere with motion detection. Testing the setup before leaving ensures correct height and angle for optimal performance.
Camera angles should face expected animal approach directions for maximum effectiveness.
Optimizing Detection Settings and Sensitivity
Your camera’s motion sensitivity and detection range settings determine whether you’ll capture wildlife or endless photos of swaying branches.
Motion sensitivity controls the threshold that triggers your camera – set it too high and every leaf movement creates false alarms, set it too low and you’ll miss distant or small animals entirely.
Detection range adjustment works in tandem with sensitivity, allowing you to fine-tune how far your camera can detect movement while maintaining accuracy in your specific environment. Most trail cameras offer detection ranges between 50-100 feet, giving you flexibility to match your monitoring needs to the terrain and expected wildlife size.
Adjusting sensitivity specifically for smaller animals ensures you don’t miss quick movements from creatures like squirrels, rabbits, or birds that might otherwise go undetected with standard settings.
Motion Sensitivity Levels
Choose high sensitivity for open fields where animals move quickly at distance. Dense forests require lower settings to avoid branches triggering captures.
Balance detection accuracy with battery conservation by testing different levels. Start with medium sensitivity, then adjust based on results.
Environmental factors like wind patterns and vegetation density should guide your final selection. Regular fine-tuning guarantees peak performance.
Detection Range Adjustment
After establishing appropriate sensitivity levels, you’ll need to set detection range based on your target wildlife size and behavior patterns.
Medium to large mammals perform best at 3-5 meters detection distance, providing clear body detail capture. Smaller mammals and birds require closer ranges of 2.5-4 meters to maintain focus clarity.
Configure your camera’s zoom calibration to match the focal length specifications with your intended detection distance. Cameras positioned too close will blur subjects, while excessive distance reduces identification detail.
The detection zone must align with species movement patterns for maximum effectiveness.
Adjust range settings according to your camera’s PIR sensor type and lens specifications. Natural wildlife corridors concentrate animal activity within ideal detection zones, improving capture success rates considerably.
Eliminating Human Scent and Presence
When wildlife cameras detect the slightest trace of human scent, animals often alter their natural behavior patterns or avoid the area entirely for days or weeks.
Effective scent neutralization techniques include using odor-eliminating sprays that neutralize volatile organic compounds emitted by your body. Create a DIY solution by dissolving baking soda and hydrogen peroxide in water, then spray clothing inside and out before drying outdoors.
Minimizing human presence starts with limiting visits to camera sites. Use cellular game cameras to monitor areas remotely and reduce on-site activity.
Handle equipment with latex gloves to prevent transferring skin oils. Apply cover scents like “Just Plain Dirt” to mask residual human odors on gear.
Store camera equipment in odor-free environments using ozone treatments before deployment.
Consider using moisture-wicking fabrics for your clothing during camera setup, as these materials help manage sweat production that can leave stronger scent trails compared to regular cotton.
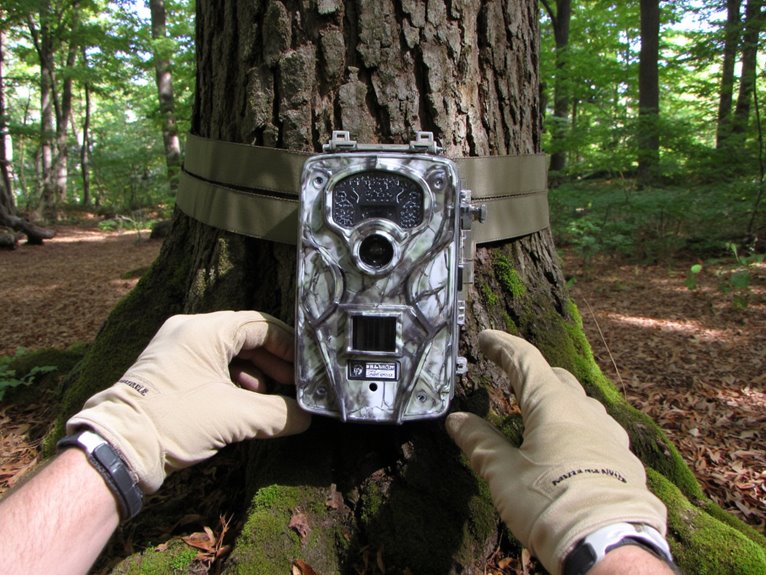
Testing Your Setup Before Deployment
Before you leave your camera unattended in the field, you must verify that your setup functions correctly through detailed testing procedures.
Start with a walk test verification by moving through the camera’s detection zone at various speeds and angles to confirm the trigger sensitivity captures target movements without excessive false activations.
Follow this with a thorough sample image review, examining photo quality, focus accuracy, and timestamp functionality to guarantee your equipment will deliver usable wildlife data throughout the deployment period.
Walk Test Verification
Once you’ve positioned your wildlife camera and configured the initial settings, conducting a thorough walk test becomes the critical difference between successful wildlife monitoring and weeks of empty memory cards. Activate test mode to verify camera responsiveness without filling your memory card. Walk through the detection zone at varying speeds to simulate different wildlife movement patterns.
| Test Parameter | Method | Expected Result |
|---|---|---|
| Trigger Speed | Walk quickly through zone | Response under 0.5 seconds |
| Detection Range | Test multiple distances | Consistent triggering at 20+ feet |
| Blind Spots | Enter from different angles | Complete zone coverage |
Test during relevant activity periods for your target species. Adjust height and angle based on results. Document ideal settings for future deployments.
Sample Image Review
Three critical hours of sample image review can prevent three weeks of disappointing field data from your wildlife camera deployment. Use your camera’s built-in test mode to capture sample shots under varying light conditions.
Walk in front of the camera at different distances to evaluate detection zone coverage and response time accuracy. Download test images to your computer for detailed assessment of image quality and focus clarity.
Check for proper exposure in daylight and nighttime conditions, ensuring IR flash effectiveness doesn’t create overexposed hotspots. Examine metadata timestamps for accuracy across time zones.
Adjust camera angle, height, and sensitivity settings based on review results. Repeat testing iteratively until images meet your monitoring objectives, eliminating false triggers while maintaining target species detection sensitivity.
Mastering Low-Light Photography Techniques
When darkness falls and nocturnal wildlife emerges, your camera’s standard settings won’t capture the detailed images you’re seeking. Wildlife nightshooting demands specific technical adjustments to overcome challenging lighting conditions.
Start with your aperture wide open-f/1.8 to f/5.6 maximizes light intake while controlling depth of field. Set shutter speeds around 1/100 second or slower, balancing ambient light capture with motion blur risks. Use burst mode to compensate for unpredictable animal movements.
Increase ISO sensitivity within your camera’s limits to maintain image clarity. Modern DSLRs and mirrorless cameras handle higher ISOs before noise degrades quality.
Low light lenses with wide maximum apertures perform best-telephoto options like 150-600mm maintain safe distances while gathering sufficient light.
Avoid underexposure as it amplifies noise during post-processing.
Essential Equipment and Maintenance Preparation
Technical mastery in low-light conditions means nothing without proper equipment preparation and systematic maintenance protocols. Your camera body must feature weather-sealed construction to withstand harsh outdoor conditions. Robust housings prevent moisture infiltration and temperature fluctuations from damaging internal components.
Lens selection requires telephoto options ranging 200mm–600mm for distant shooting without disturbing wildlife. Image stabilization reduces motion blur during handheld operation. Carbon fiber tripods provide lightweight stability for heavy telephoto lenses.
Deploy high-capacity CF Express memory cards and multiple lithium batteries for extended field operation. Mount cameras at 4-5 feet height using lockable straps on sturdy trees. Clear vegetation from sensor paths to prevent false triggers.
Schedule regular maintenance visits to inspect battery levels, memory capacity, and lens cleanliness. Verify weatherproof seals after storms to maintain equipment integrity.
On a final note
You’ve now mastered the essential techniques for stealth camera deployment. Your success depends on precise positioning, ideal sensitivity calibration, and complete scent elimination. Test your setup thoroughly before leaving it unattended. Monitor battery levels and memory card capacity regularly. Follow these protocols consistently, and you’ll capture authentic wildlife behavior without detection. Remember: patience and attention to technical details separate successful wildlife photographers from those who only document empty landscapes.