Best Film Scanners: Take High-Quality Backup Of Your Analog Photos
We are supported by our audience. When you purchase through links on our site, we may earn an affiliate commission, at no extra cost for you. Learn more. Last update on 27th September 2023 / Images from Amazon Product Advertising API.
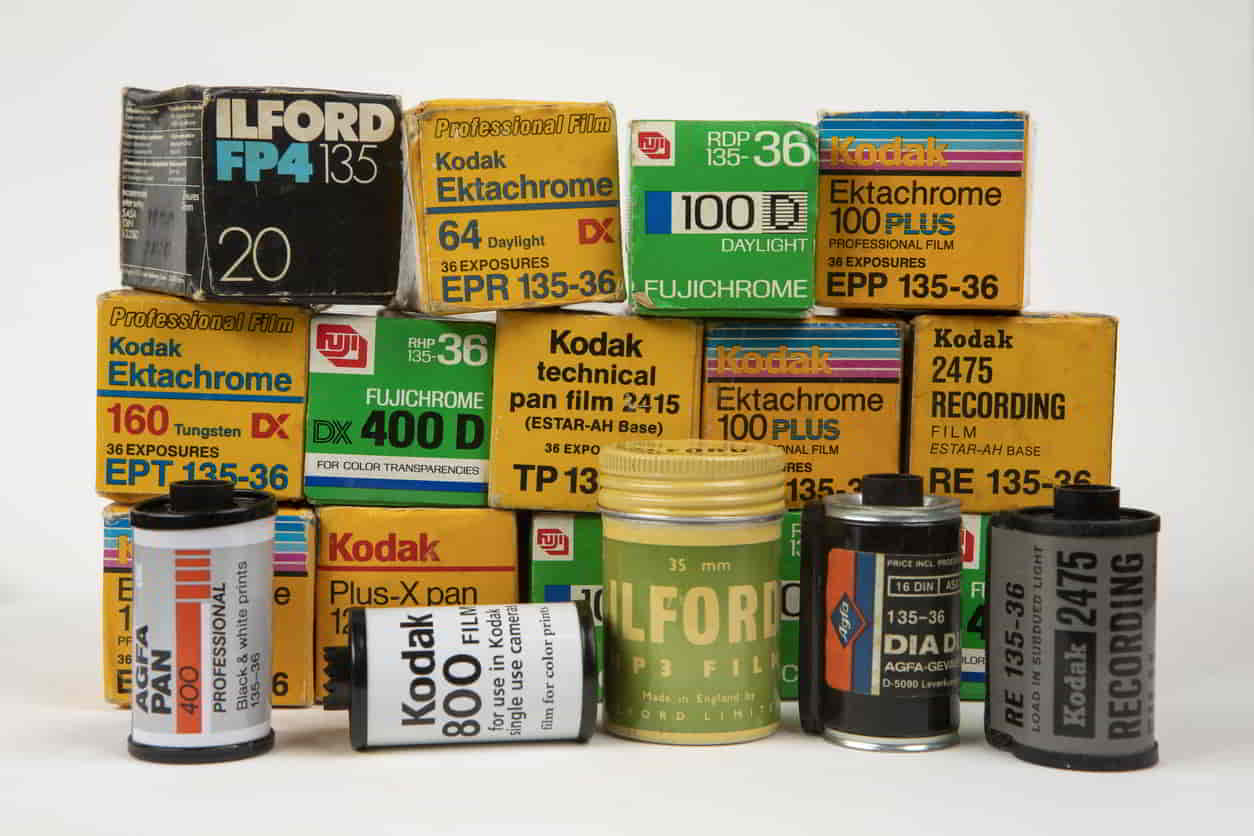
If you’re a photography enthusiast or professional, you’ve likely heard the phrase ‘a picture is worth a thousand words.’
But what about the value of a physical film negative? The nostalgia, the artistry, and the unique qualities that come with shooting on film are all reasons why many photographers still choose to use this medium. However, with the advancement of technology, it’s becoming increasingly important to digitize these film originals to preserve them for future generations. That’s where film scanning and digitization come in.
In this article, you’ll learn about the importance of film preservation and the benefits of scanning and digitizing your film images. Whether you’re a beginner or a seasoned professional, we’ll provide an overview of the best film scanners on the market, as well as tips and tricks for film scanning software and post-processing your images.
So, whether you’re looking to preserve your family’s old film negatives or digitize your own film work, this guide will help you choose the right film scanner for your needs and get the most out of your scanned images.
Best Film Scanners
Image | Product | Our Rating | Price |
---|---|---|---|
![]() | KODAK Mini Digital Film & Slide Scanner | 9.7 | Check Price on Amazon |
![]() | KODAK SCANZA Digital Film & Slide Scanner | 9.5 | Check Price on Amazon |
![]() | Magnasonic All-in-One High Resolution 22MP Film Scanner | 9.1 | Check Price on Amazon |
![]() | Wolverine Titan 8-in-1 High Resolution Film to Digital Converter | 8.8 | Check Price on Amazon |
![]() | KODAK Mobile Film Scanner | 8.6 | Check Price on Amazon |
![]() | DIGITNOW Film Scanners with 22MP | 8.2 | Check Price on Amazon |
![]() | 135 Film Scanner High Resolution Slide to Digital JPEG Save | 8 | Check Price on Amazon |
![]() | zonoz FS-5 Digital Film & Slide Scanner | 7.7 | Check Price on Amazon |
![]() | KODAK Slide N SCAN Film and Slide Scanner with Large 5” LCD Screen | 7.4 | Check Price on Amazon |
![]() | DIGITNOW 22MP All-in-1 Film & Slide Scanner | 7.2 | Check Price on Amazon |
Last update on 27th September 2023 / Affiliate Links / Images from Amazon Product Advertising API
Our recommended scanners:
KODAK Mini Digital Film & Slide Scanner – Converts 35mm, 126, 110, Super 8 & 8mm Film Negatives
- AMAZING MINIATURE FILM SCANNER – All-in-One Device Lets You Scan, View, Edit, Convert & Save Old 135, 126, 110, Super 8 & Monochrome Negatives & Slides; Turn Your Old Pictures Into Sharp, Clear, Detailed Color or Black & White JPEG Files
- MULTIPLE ADAPTERS FOR FAST LOADING – Enjoy Maximum Compatibility & Ease of Conversion w/ a Variety of Adapters Designed for Fast, Continuous Loading; Improve Quality Up to 14/22MP w/ Adjustable Brightness, Color & Reverse/Flip
- UPDATED USER INTERFACE WITH 2.4” LCD – Dedicated Scan & Home Buttons Provide Easy One-Press Scanning & Quicker Menu Navigation; View & Edit Current Slide or Gallery Pictures on the Color Display [Internal Memory Holds Up to 128MB]
- MEMORIES FOR THE NEW MILLENNIUM – Use Any SD Card Up to 32GB [Not Included] Perfect for Enhancing & Printing Old Photos & Sharing Old Film Formats on Social Media
- 3-IN-1 INTERNATIONAL ADAPTER & MORE – Extended Accessories Pack Includes Universal Power Source for US, EU & UK, Cleaning Wand, USB Cable & TV Cable Power Adapter; View Images Big Screen TV, Etc.
Last update on 27th September 2023 / Affiliate Links / Images from Amazon Product Advertising API
The Kodak Mini is one of the most versatile scanners you can find in the market. Despite its small size, the device can scan and save 135mm 35, 126, 110, and Super 8 negatives and slides, turning your old photos into JPEG files. It can store 22mp files and, a built-in 2.4 LCD is useful for quickly navigating through menus, and the dedicated scan/save buttons make the scanning of photographs an easy one-button process.
Overall an easy-to-use scanner compatible with all the film/negatives sizes of your collection can be found at a very attractive price for its features. It comes with all the essential adapters and accessories, so you only need to add an SD card (up to 32GB) to start saving your precious photos digitally. I would consider this the best film scanner at this price range.
KODAK SCANZA Digital Film & Slide Scanner – Converts 35mm, 126, 110, Super 8 & 8mm Film Negatives
- FILM TO JPEG IN SECONDS – Powerful 14/22MP KODAK Film Scanner Converts Old 35mm, 126, 110, Super 8 & 8mm Negatives & Slides to JPEG Digital Files – NOTE; THE SCANZA WILL NOT CONVERT FILMS OTHER THEN 35mm, 126, 110, Super 8 & 8mm Negatives
- LARGE, BRIGHT 3.5” TFT LCD – High Definition Built-In Color Display Features Adjustable Brightness & Convenient Tilt for Easy Operation & Image Viewing
- AN ADAPTER FOR EVERYTHING – Unit Arrives w/Multiple Film Inserts & Adapters for Fast, Flexible Operation; Big One-Touch Buttons Allow for One-Step Scan & Save
- INTUITIVE USER INTERFACE – Includes Helpful Tray & Insert Directory; Easily Edit Image RGB & Resolution, Browse Gallery [SD Card NOT Included, supports up to 128GB] & More
- CABLES & EXTRAS INCLUDED – Mac & PC Compatible Converter Comes w/USB Power Cable, HDMI Cable, AC Adapter, Video Cable & FREE Film Cleaning Brush. Use the included brush to also clean the light box of dust and speckles, to avoid marks on the scanned images.
Last update on 27th September 2023 / Affiliate Links / Images from Amazon Product Advertising API
The Kodak Digital is the larger model from Kodak that features a large 3.5″ LCD for easier operation and image viewing. It can digitize your 35mm, 126, 110, super 8, and 8mm negatives and slides into JPEG images in seconds. Its one-step scan&save process makes storing your photos a breeze and comes with all the necessary accessories to get you started. It supports SD cards up to 128GB for storing your photographs, and this is the only extra purchase you have to make before you start scanning your old photos. Thanks to its attractive price, this is one of the most popular scanners in the market and definitely worths a closer look.
Magnasonic All-in-One High Resolution 22MP Film Scanner
- Effortlessly convert your 35mm, 126KPK,110, Super 8 and Negatives into premium high resolution 22MP digital photo JPEG files. Still images only, not video. Relive and share your memories in no time with only the push of a button.
- View your scanned slides and films with the built-in, vibrant full color, 2.4 inch LCD screen or directly onto your television with the included Video Out TV cable. No computer is needed to transform your slides from outdated to updated.
- Thanks to the generous 128MB of built-in memory, save up to 100 images directly onto the All-in-One Converter. The easy to use SD card slot expansion allows you to hold even more of your high resolution images until you are ready to transfer them to your computer, smartphone, tablet or digital picture frame.
- Quickly and seamlessly scan all your film without the need to precut into strips and painfully line up correctly. When teamed up with the one-touch scanning software you can go from loading to saving in less than 5 seconds.
- Start editing your photos right out of the box with the easy to use plug-and-play interface. No complicated computer software or driver installation needed.
Last update on 27th September 2023 / Affiliate Links / Images from Amazon Product Advertising API
The Magnasonic All in 1 is an excellent choice for anyone looking for a scanner at a budget-friendly price. It can convert 126KPK, 135, 110, super 8, and Negatives into 22mp digital JPEG files. The 2.4″ built-in screen will allow you to view your scanned photos, and its video out cable will also let you connect your TV for even a larger viewing screening. It features 128MB built-in memory that can store up to 100 photos, yet you store even more by adding an SD card to its slot. The one-touch scanning software is quite handy and will let you digitize your old photos easily in seconds—overall, it is a great choice for anyone on a budget without compromising.
Plustek OpticFilm 8200i SE Scanner – Top Recommended Film Scanner for Beginners
Looking for a film scanner that’s easy to use and produces high-quality scans? Look no further than the Plustek OpticFilm 8200i SE – it’s the perfect choice for beginners who want to bring their old photos to life!
This scanner is designed with user-friendliness in mind, with its simple interface and bundled software that makes it easy to get started on your digitization journey. The Plustek OpticFilm 8200i SE is also equipped with a built-in infrared channel that detects dust and scratches, allowing for easy removal without the need for retouching.
With a 7200 x 7200 dpi resolution and up to 3.6 Dynamic Range Enhanced Multi-Exposure Function, this scanner delivers stunningly clear and vibrant scans that will make your old photos look brand new.
Product Specs:
- Built-in infrared channel for detecting dust and scratches
- 7200 x 7200 dpi resolution for 35mm negatives and mounted slides
- 48-bit input, 24/48-bit output
- Up to 3.6 Dynamic Range Enhanced Multi-Exposure Function
- Bundled with Plustek QuickScan and LaserSoft Imaging Silverfast SE Plus 8 software
- Supports Windows 7/8/10/11 and Mac OS 10.7 to 11.x
- Product dimensions: 4.72 x 10.71 x 4.69 inches
- Item weight: 3.53 pounds
- ASIN: B008ASJ2Z8
- Item model number: 8200I SE
Pros:
- Simple interface and bundled software make it easy for beginners to use
- Built-in infrared channel detects dust and scratches for easy removal
- High resolution and Dynamic Range Enhanced Multi-Exposure Function produce stunningly clear and vibrant scans
Cons:
- May require downloading driver from Plustek website for setup
- SilverFast software may have a learning curve and may not be necessary for all users
- Multi-Exposure function may not have a noticeable effect on image quality
Epson Perfection V850 Pro scanner – Top Recommended Film Scanner for Professionals
If you’re a professional in need of unparalleled scans with remarkable tonal range and fine shadow detail, the Epson Perfection V850 Pro scanner with its dual lens system and high-speed mode is the perfect choice for your film and slide scanning needs.
With its 6400 dpi resolution, advanced optics, and exclusive dual lens system, this scanner delivers exceptional results that are unmatched by any other scanner in its class. The high-speed mode of the scanner provides quick and efficient scanning of full-color and monochrome images, making it perfect for busy professionals who need to scan large quantities of images quickly.
The Epson Perfection V850 Pro scanner is designed to offer professional-quality scans of slides and film, making it suitable for archiving film and photos. Its LED array and Digital ICE technology provide advanced optics that help to eliminate scratches and other defects from your scanned images. Additionally, the scanner is RoHS compliant and recyclable, making it an eco-friendly option for those who are conscious about the environment.
Product Specs:
- Dimensions: 12.1 x 19.8 x 6 inches
- Weight: 20.9 pounds
- Model Number: B11B224201
- Batteries: 1 Lithium Ion batteries required.
- Operating Systems: Windows 8.1, Windows 8, Windows 7, Windows Vista, Windows XP, Windows XP professional x64 Edition and Mac OS X 10.6.X, 10.7.X, 10.8.X, 10.10.X
- Scanning Speed: High-speed mode: 4800 dpi|Full color: 10.8 msec / line (approx.)|Monochrome: 10.8 msec / line(approx.)
- Includes film holders
Pros:
- Unparalleled scans with 6400 dpi resolution & Advanced Remarkable tonal range of 4.0 Dmax for smooth gradations & fine Shadow detail
- Exclusive dual lens system: selects from 2 lenses for optimum results
- Suitable for archiving film and photos
Cons:
- The scanner may require time to learn and carefully follow instructions
- Third-party scanning software may be necessary for professional use
- The Dust & Scratches filter may cause major color compression in scanned images
Kodak SCANZA Digital Film & Slide Scanner – Best Film Scanners for 35mm Film
The Kodak SCANZA Scanner is a convenient and versatile device that easily converts old 35mm, 126, 110, Super 8 & 8mm negatives and slides to JPEG digital files, providing a simple solution for those looking to preserve their cherished memories.
With its large, bright 3.5’ TFT LCD with adjustable brightness and tilt, the scanner offers a user-friendly interface and helpful tray and insert directory to make the scanning process quick and easy.
The device is also Mac and PC compatible, with a USB power cable, HDMI cable, AC adapter, video cable, and free film cleaning brush included in the package.
The Kodak SCANZA Scanner is a budget-friendly option for those looking to digitize their film collections. While the quality is less than that of an image taken with a 22mp digital camera, the large 3.5’ LCD screen, 14-megapixel sensor, and integrated interpolation make it a great option for personal use.
The device comes with multiple film inserts and adapters to accommodate a variety of film sizes, making it a flexible tool for scanning old family photos and negatives. However, it is important to note that the device is limited to scanning film and cannot develop or scan raw film, and the Super 8 format converts to still images, not video.
Product Specs:
- Converts 35mm, 126, 110, Super 8 & 8mm negatives and slides to JPEG digital files
- Large, bright 3.5’ TFT LCD with adjustable brightness and tilt
- Multiple film inserts and adapters for fast and flexible operation
- Mac and PC compatible with USB power cable, HDMI cable, AC adapter, video cable, and free film cleaning brush
- Large 3.5’ LCD screen, 14-megapixel sensor, and integrated interpolation
- 3 numbered slide inserts and 3 numbered adapter trays
Pros:
- Budget-friendly option for personal use
- Multiple film inserts and adapters to accommodate a variety of film sizes
- Large, bright LCD screen for easy viewing
- User-friendly interface with helpful tray and insert directory
- Mac and PC compatible
Cons:
- Limited to scanning film and cannot develop or scan raw film
- Super 8 format converts to still images, not video
- Quality is less than an image taken with a 22mp digital camera
- Auto shut off is not adjustable and may interrupt scanning process
- Settings do not save after shut down
Epson Perfection V600 – Best Film Scanners for Medium Format Film
Get ready to experience the magic of reliving your precious memories in stunning detail with the Epson Perfection V600 scanner. This scanner is the best option for those looking to digitize medium format film.
With a high resolution of 6400 x 9600 dpi, the V600 allows for enlargements up to 17 inches x 22 inches. The built-in transparency unit can scan slides, negatives, and medium format panoramic film up to 6 x 22 cm. Additionally, the scanner features Digital ICE technology for both film and prints to remove dust, scratches, tears, and creases from your precious photos.
The V600 also includes Epson’s Easy Photo Fix software to restore faded color photos, and ABBYY FineReader Sprint Plus OCR to convert scanned documents into editable text. With four customizable buttons, you can easily scan, copy, scan to email, and create PDFs. The scanner also has a Ready Scan LED light source for no warm-up time, faster scans, and lower power consumption. Compatible with both Windows and Mac operating systems, the V600 is a versatile and powerful option for those looking to digitize their medium format film.
Product specs:
- High resolution: 6400 x 9600 dpi
- Maximum scan area: 8.5 x 11.7 inches, TPU 2.7 x 9.5 inches
- Built-in transparency unit to scan slides, negatives, and medium format panoramic film up to 6 x 22 cm
- Digital ICE technology for film and prints to remove dust, scratches, tears, and creases
- Epson Easy Photo Fix software included to restore faded color photos
- ABBYY FineReader Sprint Plus OCR to convert scanned documents into editable text
- Four customizable buttons for instant scanning, copying, scanning to email, and creating PDFs
- Ready Scan LED light source for no warm-up time, faster scans, and lower power consumption
- Compatible with Windows and Mac operating systems
Pros:
- High resolution allows for enlargements up to 17 inches x 22 inches
- Includes Digital ICE technology for both film and prints to remove imperfections
- Built-in transparency unit can scan slides, negatives, and medium format panoramic film
- Epson Easy Photo Fix software included to restore faded color photos
- ABBYY FineReader Sprint Plus OCR to convert scanned documents into editable text
- Four customizable buttons for easy scanning and document creation
Cons:
- May not be the best option for those looking to digitize 35mm film
- Some users have reported difficulty with the included software
- May be too expensive for those on a tight budget.
KODAK Slide N SCAN Film and Slide Scanner – Best Film Scanners for Slides
Now that you’ve learned about the Epson Perfection V600, let’s talk about another top film scanner on the market – the KODAK Slide N SCAN Film and Slide Scanner. This scanner is specifically designed for slides and offers a cost-effective and user-friendly option for digitizing your old photos without the need for expensive equipment or a dedicated lab.
With the KODAK Slide N SCAN, you can convert old color and black and white negatives in 135, 110, and 126mm formats, as well as slides in 135 (35mm or 50mm with the cardboard frame), 110, and 126mm formats to digital files. The scanner saves directly to an SD card (not included), and features a 5-inch LCD display with gallery mode for previewing and editing photos.
The quick-feeding tray technology allows for continuous loading action, and the scanner comes with a 50mm slide holder, adapters for 135, 110, and 126 films, a cleaning brush, USB and HDMI cables, and advanced capture software for enhancing, resizing, and converting photos with a single touch.
Product Specs:
- 13/22MP digital film scanner
- Compatible with 135, 110, and 126mm formats
- Saves directly to SD card (not included)
- 5-inch LCD display with gallery mode
- Quick-feeding tray technology
- Includes 50mm slide holder, adapters for 135, 110, and 126 films, cleaning brush, USB and HDMI cables
- Advanced capture software for enhancing, resizing, and converting photos
Pros:
- Cost-effective and user-friendly option for digitizing old photos
- Easy to set up and use with little reference to the manual
- Shows what the picture will look like, switching easily between transparencies and negatives
- Storing photos on an SD card and transferring them to a computer is simple
Cons:
- Media carrier can be difficult to insert into the slot
- Scanning individual pictures is still time-consuming
- Quality of resulting images may vary based on the condition and quality of the original photo
Magnasonic All-in-One 24MP Film Scanner – Best Film Scanners for Negatives
You might be interested to know that the Magnasonic All-in-One Film Scanner can convert a variety of film negatives and slides into high resolution 24MP digital JPEG files without the need for a computer. This means that you can easily digitize your treasured memories and view them on the scanner’s 5-inch LCD screen or on a TV or monitor using an HDMI cable (not included).
The scanner also has built-in memory and an SD card slot that can support up to 128GB of expandable memory, allowing you to easily save and transfer your scanned files.
If you’re looking for a fast and easy scanning process, the Magnasonic All-in-One Film Scanner comes with fast-loading film trays that make it easy to scan multiple negatives or slides at once. Additionally, the scanner has built-in adjustments for brightness, RGB color correction, flip, and mirror, which means that you don’t need a computer to make these adjustments.
However, some customers have reported issues with file naming and order when scanning large batches of photos, and the film adapter may have plastic ridges that can catch on slightly bent film. Additionally, the scanner crops small portions of negatives when scanning, but you can adjust the position of the negative before saving the photo.
Product Specs:
- Converts 35mm/110/126/Super 8 film negatives & 135/126/110 slides into high resolution 24MP digital JPEG files
- Multiple ways to view: 5’LCD screen or HDMI cable (not included) to view on TV or monitor
- Built-in memory & SD card slot for up to 128GB of expandable memory
- No computer needed for adjustments such as brightness, RGB color correction, flip and mirror
- Fast & easy scanning with included fast-loading film trays
- Product Dimensions: 5.43 x 4.44 x 4.91 inches
- Item Weight: 13.4 ounces
- ASIN: B086DX4253
- Item model number: FS71UK
Pros:
- No computer needed for adjustments
- Multiple ways to view scanned files
- Fast and easy scanning process with included film trays
Cons:
- Issues with file naming and order when scanning large batches of photos
- Film adapter may have plastic ridges that can catch on slightly bent film
- Scanner crops small portions of negatives when scanning
Veho Smartfix Portable Stand Alone 14 Megapixel Negative Film & Slide Scanner – Best Portable Film Scanners
Looking for a fast and convenient way to convert your old film negatives and slides into high-quality digital images? Check out the Veho Smartfix Portable Stand Alone 14 Megapixel Negative Film & Slide Scanner.
This scanner has a range of advanced features and a lightweight, portable design that makes it easy to use anywhere. The stand-alone design means that you don’t need a computer or software to use it, and the built-in 2.4 TFT LCD screen allows for instant previews of your images. The one-touch scanning feature makes it incredibly easy to use, while the Tacton rubber touch finish ensures a comfortable grip.
The Veho Smartfix scanner also has built-in auto-exposure, colour balance, and other image enhancements, ensuring that your images come out looking their best. The scanner is compatible with both NTSC and PAL video formats and can support up to 32GB SDHC/SD card (not included).
It comes with a USB charging cable and a removable lithium-ion rechargeable battery, making it completely portable. The scanner also comes with several negative tray options, a cleaning brush, USB-A to Mini-B USB cable, and 3.5mm jack to yellow RCA cable.
Product Specs:
- Converts 135 slides and 135/110/126 negatives into digital images
- Stand-alone portable design with no computer or software required
- Small/lightweight with built-in 2.4 TFT LCD screen, one touch scanning and Tacton rubber touch finish
- Instant preview and built-in auto-exposure, colour balance and other image enhancements
- Optional USB connection compatible with Mac/PC for easy file transfer
- Supports up to 32GB SDHC / SD card (not included)
- Product Dimensions: 4.3 x 5.5 x 3.9 inches
- Item Weight: 12.8 ounces
- ASIN: B072KKDL3N
- Item model number: VFS-014-SF
Pros:
- Stand-alone design means no computer or software needed
- Portable and lightweight design
- One-touch scanning for easy use
- Built-in auto-exposure and colour balance for high-quality images
- Compatible with both NTSC and PAL video formats
- Comes with several negative tray options and cleaning brush
Cons:
- Cannot save images directly to a computer
- SD card not included
Wolverine Titan 8-in-1 High Resolution Film to Digital Converter – Best Budget Film Scanners
If you’re on a budget but still want to convert your old film and slides into digital images, there are some great options for affordable film scanners available. One such option is the Wolverine Titan 8-in-1 High Resolution Film to Digital Converter. It can handle various film formats, including 35mm, 110, 127, 126, and APS, as well as negatives, slides, and even some Super 8 film. It produces images with a resolution of up to 20MP and has a large, easy-to-use 4.3-inch color LCD screen for previewing and editing your scans.
Another budget-friendly film scanner is the Plustek OpticFilm 8100. It specializes in scanning 35mm film and boasts a high resolution of 7200 dpi and a dynamic range of 3.6, which helps to capture even the smallest details and nuances in your film. This scanner also comes with SilverFast SE Plus 8 software, which allows for more advanced editing and color correction. It’s a great option for those who prioritize image quality and have a large collection of 35mm film to digitize.
Product Specs:
- Wolverine Titan 8-in-1 High Resolution Film to Digital Converter
- Compatible with 35mm, 110, 127, 126, and APS film, as well as negatives and slides
- Produces images with a resolution of up to 20MP
- 4.3-inch color LCD screen for previewing and editing scans
- Plustek OpticFilm 8100
- Specializes in scanning 35mm film
- High resolution of 7200 dpi and dynamic range of 3.6
- Comes with SilverFast SE Plus 8 software for advanced editing and color correction
Pros:
- Affordable options for those on a budget
- Capable of handling various film formats
- Produces high-quality digital images with good resolution
- User-friendly interfaces and large LCD screens for easy previewing and editing
Cons:
- May not produce the same level of quality as higher-end film scanners
- Limited to specific film formats
- Some users have reported issues with image quality and color accuracy
The Advantages of Film Photography
If you’re still not convinced that film photography is worth exploring, let me share with you some of the advantages of shooting with film cameras.
Firstly, film photography offers creative freedom that digital cameras simply can’t match. With film, you have to pre-visualize the image you want to create and make choices about film stock, aperture, shutter speed, and lighting, all of which can affect the final result. This process encourages photographers to think more critically about their craft, leading to more thoughtful and deliberate images.
In addition to creative freedom, film photography also offers a unique aesthetic that can’t be replicated by digital means. Film grain, for example, is often seen as a drawback of film photography, but it can also add character and texture to an image. Additionally, different film stocks have distinct color palettes and tonal ranges that give them their own unique look. Photographers can use this to their advantage, selecting a film stock that best matches their vision for a particular project.
Another advantage of film cameras is their simplicity and durability. Unlike digital cameras, film cameras require no batteries to operate, making them more reliable in the field. Additionally, most film cameras have simple, intuitive controls that are easy to learn and use. This simplicity also means that film cameras can last for decades with proper care, making them a worthwhile investment for any photographer.
Lastly, film photography offers a tactile, hands-on experience that digital photography simply can’t match. From loading film into the camera to developing negatives in a darkroom, every step of the process is a physical, immersive experience that can be incredibly rewarding. For those who enjoy working with their hands and experiencing the full range of photographic chemistry, film photography is an excellent choice.
The Drawbacks of Film Photography
You may be hesitant to dive into film photography due to its drawbacks, such as the cost of film and developing, limited exposure count, and the need for specialized equipment like a film scanner.
One of the most significant drawbacks of film photography is the cost of equipment. Unlike digital photography, which only requires a camera and a computer, film photography requires a camera, film, and a film scanner. The cost of these items can add up quickly, especially if you want high-quality equipment. Additionally, film photography requires ongoing expenses for film and developing, which can add up over time.
Another drawback of film photography is the limited availability of film and developing services. While film photography has seen a resurgence in popularity in recent years, it is still not as widely available as digital photography. Many photography stores and labs have closed in recent years, making it more difficult to find film and developing services. This can be frustrating for photographers who live in areas without access to these services, as it can limit their ability to shoot film.
The need for specialized equipment is another drawback of film photography. Unlike digital photography, which can be done with a smartphone camera, film photography requires specialized equipment like a film scanner. While there are entry-level scanners available, high-quality scanners can be expensive and require a significant investment. Additionally, film scanners can be time-consuming to use, as each frame must be scanned individually.
While film photography has many advantages, it also has its drawbacks. These include the cost of equipment, limited availability of film and developing services, and the need for specialized equipment like a film scanner. However, for many photographers, the unique look and feel of film are worth the extra cost and effort. If you’re interested in exploring film photography, it’s important to be aware of these drawbacks and plan accordingly.+
The Importance of Film Preservation
Preserving films is pivotal for posterity, as they’re considered priceless pieces of our past and present. The historical significance of motion pictures can’t be overstated, as they provide us with a glimpse into our cultural heritage and the way we lived in the past.
However, preserving films comes with its own set of challenges, and it requires a combination of preservation techniques, restoration methods, and archiving standards to ensure that films remain viewable for future generations.
Preservation techniques involve slowing down the decay of films by controlling the environment in which they’re stored. This includes maintaining low humidity and temperature levels and storing films in acid-free containers.
Restoration methods go beyond physical copying and involve reconstructing the most authentic version of a film. This includes repairing physical damage, removing scratches, and enhancing the quality of the image and sound.
Archiving standards refer to the best practices and guidelines for storing and preserving films, as well as the metadata that accompanies them. These standards ensure that films are organized, accessible, and easily retrievable.
Storage solutions are also a critical aspect of film preservation. Most studios are now investing in sophisticated storage facilities and restoring older features for which they own commercial rights. However, independent producers and distributors generally lack the resources and organizational continuity to mount expensive asset protection programs.
Federal film preservation funding has supported the copying of deteriorating film in tax-exempt institutions, as well as the preservation programs of the National Archives and the Library of Congress. However, when adjusted for inflation, federal funding for preservation programs has fallen to half its 1980 level.
Preserving films is crucial for future generations, and it requires a combination of preservation techniques, restoration methods, archiving standards, and storage solutions. The challenges of preserving films are multifaceted, and they require a sustained effort from the film industry, government, and private organizations.
Despite the challenges, the importance of film preservation can’t be overstated, as films provide us with a unique window into our cultural heritage and the way we lived in the past.
The Benefits of Film Scanning and Digitization
Imagine being able to relive cherished memories captured on film in a digital format that can be easily shared and preserved for future generations. Film scanning and digitization offer several advantages that make it a worthwhile investment.
Below are some of the benefits of film scanning and digitization:
- Nostalgia: Film scanning and digitization offer a way to relive the past and cherish memories captured on film. This is especially important for those who have old family photos or home movies that they want to preserve for future generations. Digitizing your film allows you to easily store and share these memories with friends and family.
- Archiving: Film scanning and digitization offer a way to archive film and protect it from deterioration over time. This is especially important for those who have rare or one-of-a-kind film that they want to preserve. Digitizing your film ensures that it is protected from physical damage and can be easily accessed in the future.
- Versatility: Digitizing your film allows you to use it in a variety of ways. For example, you can easily edit and enhance your photos or movies, or use them in digital projects such as slideshows or videos. Digitizing your film also allows you to easily share your memories on social media or other digital platforms.
- Quality Control: Digitizing your film allows you to have greater control over the quality of your images or movies. You can adjust the brightness, contrast, and color balance, and even remove scratches and dust from the film. This ensures that your memories are preserved in the best possible quality.
Film scanning and digitization offer several advantages that make it a worthwhile investment for anyone interested in preserving their memories captured on film. With the ability to relive nostalgia, archive film, use it in a variety of ways, and have greater quality control, digitizing your film is a valuable tool for preserving the past.
How Film Scanning Works
Get ready to dive into the fascinating world of film scanning, where analog memories are transformed into digital ones with the click of a button! Understanding how film scanning works is essential to achieving the best results. The scanning process involves capturing an image of the film using a specialized scanner. The scanner then converts the image into a digital file that can be saved and edited on a computer.
To ensure high-quality digital files, it’s important to consider the film type being scanned. The table below outlines the most common types of film and their recommended scanning resolutions. It’s also important to use a scanner with dust reduction technology to minimize the need for manual cleaning. Additionally, the scanner software plays a crucial role in achieving accurate color reproduction and sharpness.
When scanning film, it’s important to choose a scanner that meets your needs in terms of image quality, budget, and desired features. Entry-level scanners are suitable for basic conversions, while midrange and high-quality scanners offer higher-resolution sensors and more manual controls. It’s also worth considering alternative scanning methods, such as re-photographing film with a DSLR camera and macro lens or using a flatbed scanner with improved resolution.
Understanding the scanning process, film types, dust reduction, and scanner software is crucial to achieving high-quality digital files. Choosing the right scanner for your needs can make all the difference in the final result. With the right tools and techniques, you can preserve your analog memories for years to come.
Types of Film Scanners
If you’re looking to convert your film originals into digital files, you’ll want to know about the different types of film scanners available.
Scanner options include flatbed scanners, negative scanners, and drum scanners. Flatbed scanners are versatile and affordable, but not the best option for professional scanning. Negative scanners offer impressive image quality and are easy to use, while drum scanners provide the highest scan quality but are expensive and complex.
When considering scanner options, it’s important to take into account software compatibility, color accuracy, and dust reduction capabilities. Good scanning software is necessary for processing images, and some scanners come with their own software while others require separate purchases.
Color accuracy is crucial for achieving high-quality results, so look for scanners with good color depth and Dmax values. Dust reduction technologies can cut down on cleaning time and improve the overall quality of your scans.
Price range is also an important factor to consider when choosing a film scanner. Entry-level film scanners are available for basic conversions, while mid-range scanners have higher-resolution sensors and more manual controls. High-quality film scanners offer dedicated options for the most detail and color accuracy.
It’s important to research and train yourself on the specific scanner you choose in order to achieve the best results. Follow the manufacturer’s directions for optimal performance.
Flatbed Scanners vs. Dedicated Film Scanners
To achieve the utmost accuracy and artistry in your digital conversions, consider the advantages of using a Dedicated Film Scanner over a Flatbed Scanner.
While flatbed scanners have improved greatly in recent years with higher resolutions, they still use a reflective light source that may have difficulty capturing different densities or exposure of each individual slide or negative. In contrast, Dedicated Film Scanners use transmissive light sources that offer greater density and clarity scanned from the film, allowing for customization of each individual slide or negative.
Dedicated Film Scanners also offer higher dynamic range than flatbed scanners, with most offering dynamic ranges greater than 3.6. This is important for capturing the degree of tonality that is present within the scan, with 0 being the purest white and 4.0 being the deepest black. Flatbed scanners may have difficulty with capturing the full range of tones.
Additionally, Dedicated Film Scanners allow exposure or scanning of each frame at varying degrees of resolutions and corrections, providing greater flexibility in editing, enhancing, and publishing. Another advantage of Dedicated Film Scanners is their software control, which allows for noise reduction and dust removal. Dust-reduction technologies can cut down on cleaning time, and many Dedicated Film Scanners offer batch features as well.
They also offer better film format compatibility, speed, efficiency, workflow, organization, archival quality, and value for money in the long run. For professional photographers and enthusiasts, a Dedicated Film Scanner is a necessary investment and a reliable and efficient tool for preserving memories and creating art.
While flatbed scanners may see an advantage in scanning batch negatives or slides quickly, Dedicated Film Scanners offer superior scanning quality, dust reduction, film format compatibility, software control, and overall flexibility. They provide better accuracy in capturing details and colors, tonality and contrast, sharpness and detail, color accuracy and dynamic range.
For the utmost accuracy and artistry in your digital conversions, the advantages of using a Dedicated Film Scanner over a Flatbed Scanner are clear.
35mm Film Scanners vs. Medium Format Film Scanners
Moving on from the differences between flatbed and dedicated film scanners, let’s focus on another important distinction in film scanning: the type of film being scanned. Specifically, we’ll compare mm film scanners to medium format film scanners.
Advantages of mm film scanners include their affordability and versatility. They’re a great option for those who shoot primarily with 35mm film, which is a common format for amateur and hobbyist photographers. Most entry-level film scanners are designed to handle this format, and they typically come at a lower price point than medium format scanners. Additionally, scanners that can handle 35mm film can also often scan strips of negatives or mounted slides, providing more options for digitizing your analog photos.
However, there are also limitations to using mm film scanners. The primary disadvantage is the resolution difference when compared to medium format film scanners. Because mm film is smaller in size, the resulting digital files will have less detail and lower resolution. This means that scanned images may not be suitable for large prints or professional use. Additionally, some mm film scanners may not have the same software options for color correction and image enhancement that you may find with higher-end medium format scanners.
On the other hand, medium format film scanners offer higher resolution and more detail, making them a better choice for professional photographers or those looking to create large prints from their scans. They’re specifically designed to handle larger film formats, such as 120/220 or 4×5, resulting in higher quality digital files. Additionally, many medium format scanners come with advanced software options for color correction and image enhancement, allowing for more control over the final output.
However, the primary limitation of medium format scanners is their higher cost. They’re typically more expensive than mm film scanners, making them less accessible for those on a budget. Additionally, they may not be necessary for those who primarily shoot with 35mm film or have no need for high-resolution scans.
When choosing between mm film scanners and medium format scanners, it’s important to consider your specific needs and budget. If you primarily shoot with 35mm film and don’t require high-resolution scans, an entry-level mm film scanner may be the best option for you. However, if you shoot with larger film formats and require higher resolution scans for professional use, a medium format scanner may be worth the investment. Ultimately, it’s important to do your research and compare pricing and features to find the best fit for your individual needs.
Key differences between mm film scanners and medium format film scanners:
- Affordability and versatility are advantages of mm film scanners.
- Medium format film scanners offer higher resolution and more detail, making them better for professional use.
- The primary limitation of medium format scanners is their higher cost.
What factors should I consider when looking for the best film scanners?
Get the most out of your analog photos by knowing the top features to look for in a scanner. When choosing a film scanner, there are several key factors to consider. One of the most important features is image quality, which includes scanning resolution, color depth, and Dmax. These factors will affect the sharpness, color accuracy, and range of tones in your digital images. Another critical consideration is software compatibility. Make sure the scanner you choose is compatible with the operating system and software you plan to use for editing and processing your digital images.
Dust reduction is another important feature to look for in a scanner, especially if you plan to convert a large volume of film. Dust and scratches on the film can be time-consuming and challenging to remove, so look for scanners with built-in dust reduction technologies to save time and effort. Some scanners use infrared technology to detect and remove dust, while others have anti-static brushes or software-based dust removal tools.
Film format and volume are other crucial factors to consider when choosing a scanner. Some scanners are designed for specific film formats, such as 35mm or medium format, while others can handle a variety of film sizes. If you have a large volume of film to convert, look for scanners with batch scanning capabilities, which allow you to scan multiple images at once. Finally, consider your budget and the overall value of the scanner. A higher-priced scanner may offer more advanced features and better image quality, but it may not be necessary for your specific needs.
To summarize, here are the top features to look for in a film scanner:
Feature | Description |
---|---|
Image Quality | Includes scanning resolution, color depth, and Dmax |
Software Compatibility | Ensure the scanner is compatible with your operating system and editing software |
Dust Reduction | Look for built-in technologies to save time and effort |
Film Format and Volume | Consider the types and volume of film you plan to scan |
Budget and Value | Choose a scanner that offers the best value for your needs |
By carefully considering these factors, you can choose a film scanner that will meet your specific needs and help you get the best possible results from your analog photos.

Resolution and DPI
Now that you’ve got a good understanding of the top features to look for in a film scanner, it’s time to delve deeper into the importance of resolution and DPI. The higher the resolution and DPI, the more detail and clarity your scanned images will have. This is especially important for archiving purposes, where you want to capture as much detail as possible for future reference.
In addition to resolution and DPI, software control is also an important consideration. The software that comes with your scanner should allow you to make adjustments to brightness, contrast, and other settings that affect the final image quality. This gives you greater control over the final result, allowing you to tweak the settings until you achieve the desired outcome.
Another important consideration is dust reduction. Look for scanners that come with dust reduction technologies, such as infrared dust removal, to minimize the amount of cleaning you have to do after scanning.
Color accuracy is also an essential factor to consider. Look for scanners that offer high color depth and Dmax, as this will allow you to capture a wider range of colors and tones. You want your scanned images to reflect the colors of the original film as accurately as possible. This is especially important for professional use, where color accuracy can make or break the final result.
Color Depth and Dynamic Range
Let’s dive into the fascinating world of color depth and dynamic range, and discover why they’re crucial factors for achieving high-quality scanned images.
Color depth refers to the number of bits used to store information about the color of each pixel. The more bits used, the more colors can be represented, resulting in better color accuracy and a wider color gamut.
Dynamic range, on the other hand, is the contrast ratio between the darkest and lightest parts of an image. It measures the tonal range that a scanner can capture, including shadow detail and highlight retention.
When it comes to film scanning, color depth and dynamic range play a significant role in determining the overall quality of the scanned image. Film negatives, in particular, have a wide tonal range that can be challenging to capture accurately.
A scanner with a high dynamic range can capture more of the subtle details in the shadows and highlights, resulting in a more faithful representation of the original film. A higher color depth, such as 16 bits per channel, can also help to minimize banding and other color artifacts that can occur with lower color depth settings.
Achieving optimal color depth and dynamic range requires a combination of hardware and software. A high-quality CCD sensor and electronics are necessary to capture the subtle tonal variations in the original film.
The scanning software also plays a crucial role in processing the raw data from the scanner and converting it into a usable image file. Many scanners offer advanced features such as multi-pass scanning, dust and scratch removal, and color restoration that can further enhance the final image quality.
Color depth and dynamic range are essential factors to consider when choosing a film scanner for digitizing your film collection. A scanner with a high dynamic range can capture more details in the shadows and highlights, while a higher color depth can provide a more accurate representation of the original colors.
With the right hardware and software, you can achieve stunning results that preserve the beauty and nostalgia of your film originals.
Connectivity and Compatibility
Having a scanner with the right connectivity and compatibility is crucial for seamless integration with your computer and software. Compatibility issues can arise when using older scanners with newer operating systems. This can lead to driver update problems and software compatibility issues. It is important to choose a scanner that is compatible with your current operating system to avoid any potential issues.
Wireless connectivity has become an important feature in film scanners. Some scanners offer Wi-Fi connectivity, which allows you to transfer scanned images directly to your computer or mobile device without the need for a USB cable. This feature can be especially useful for scanning large volumes of images, as it eliminates the need for multiple trips back and forth between the scanner and your computer.
USB ports are still a common way to connect scanners to computers. It is important to ensure that the scanner you choose has a USB port that is compatible with your computer’s USB port. Some scanners come with multiple USB ports, which can be useful if you need to connect multiple devices at the same time.
Cloud storage integration is another feature that is becoming increasingly important in film scanners. Some scanners offer direct integration with cloud storage services such as Dropbox or Google Drive. This allows you to easily save scanned images to the cloud for easy access and sharing. It is important to choose a scanner that offers cloud storage integration if this feature is important to you.
Connectivity | Compatibility | Wireless Connectivity | USB Ports | Cloud Storage Integration |
---|---|---|---|---|
Wi-Fi | Driver Updates | Yes | Multiple | Dropbox, Google Drive |
USB | Software | No | Single | iCloud, OneDrive |
Ethernet | Operating | N/A | ||
System |
When choosing a film scanner, it is important to consider connectivity and compatibility features. Compatibility issues can cause problems with driver updates and software compatibility, so it is important to choose a scanner that is compatible with your current operating system. Wireless connectivity can be useful for scanning large volumes of images, while USB ports and cloud storage integration can make it easy to save and share scanned images. By considering these features, you can choose a film scanner that is well-suited to your needs.
Speed and Efficiency
You must be a real thrill-seeker if you’re still reading about the lightning-fast world of speed and efficiency in the film scanning game. Scanning speed is a key factor to consider when choosing a film scanner. Entry-level scanners may be slow, but midrange and high-quality scanners offer faster scanning times.
Batch scanning is a feature available in some scanners that allows for multiple images to be scanned at once, saving time and effort. Workflow optimization is also an important consideration for efficient film scanning. Some scanners come with software that allows for automatic dust reduction and color correction. This saves time and effort in post-processing, allowing for a smoother workflow and faster turnaround times.
Dust reduction is a critical factor in film scanning, as dust and scratches can severely impact the final image quality. Some scanners come equipped with dust-reduction technologies that minimize the need for manual cleaning. This not only saves time but also ensures better image quality.
Automatic color correction is another feature that can save time and effort in post-processing. Some scanners come with software that automatically corrects color balance and exposure, making it easier to achieve the desired final image. This feature is especially useful for those without extensive experience in color correction.
Speed and efficiency are crucial factors to consider when choosing a film scanner. Batch scanning, workflow optimization, dust reduction, and automatic color correction are all features that can save time and effort in the scanning process. By choosing a scanner with these features, you can achieve faster scanning times and a smoother workflow, ultimately leading to better image quality and a more efficient workflow.
Automatic vs. Manual Scanning
Now that you understand the importance of speed and efficiency when it comes to film scanners, let’s talk about the differences between automatic and manual scanning.
Automatic scanners, like the Pacific Image PowerSlide X, are designed to scan batches of film quickly and efficiently. These scanners are ideal for large-scale projects and can scan multiple film types and sizes. They also come equipped with software options that allow for easy editing and organization of your scanned images.
On the other hand, manual scanners require a bit more time and effort, but offer more control over the scanning process. The Plustek OpticFilm 8200i SE and Ai, for example, offer manual controls for adjusting color and exposure levels, allowing you to fine-tune your scans to your exact preferences.
When choosing between automatic and manual scanning, it’s important to consider your specific needs. If you’re working on a large project and need batch scanning capabilities, an automatic scanner may be the best option. However, if you’re looking for more control over the scanning process and are willing to spend more time on each scan, a manual scanner may be a better fit.
It’s also important to consider maintenance requirements and price differences when choosing a scanner. Automatic scanners may require more maintenance and have a higher price point, while manual scanners may require less maintenance but may be more time-consuming. It’s important to weigh the pros and cons of each option before making a decision.
- Automatic scanners are ideal for large-scale projects and can scan multiple film types and sizes quickly and efficiently.
- Manual scanners offer more control over the scanning process and allow for fine-tuning of color and exposure levels.
- Consider your specific needs when choosing between automatic and manual scanning.
- Maintenance requirements and price differences should also be taken into consideration when making a decision.

Film Scanning Software: Tips and Tricks
Now that you have learned about the best budget film scanners, it’s time to dive into the importance of film scanning software. Scanning techniques are only one part of the process; the other part is editing and organizing scanned images. In this subtopic, we will discuss tips and tricks for using film scanning software effectively.
Firstly, let’s talk about OCR (Optical Character Recognition) software. This is a technology that converts scanned documents into editable text. Many film scanning software programs have OCR capabilities that can save you time and effort. By converting your scanned documents into text, you can easily search and edit them. Batch processing is another feature that can save you time. It allows you to scan multiple images at once and apply the same settings to all of them.
Color calibration is another important aspect of film scanning software. It ensures that the colors in your scanned images are accurate and consistent. Some software programs have automatic color calibration, while others require manual adjustment. It’s important to calibrate your scanner for each batch of film you scan to ensure consistent results.
In addition to these features, there are many other tips and tricks to using film scanning software effectively. For example, using a custom naming convention for your scanned files can help keep them organized. You can also use software to remove dust and scratches from scanned images, although it’s important to use these features sparingly to avoid over-processing your images.
Overall, film scanning software is an essential part of the film scanning process. It allows you to edit and organize your scanned images effectively, saving you time and effort. By using features like OCR, batch processing, and color calibration, you can ensure that your scanned images are accurate and consistent. With the right software and techniques, you can turn your film originals into high-quality digital files.
Scanning Techniques | Image Editing |
---|---|
OCR software | Dust and scratch removal |
Batch processing | Custom naming convention |
Color calibration | Color correction |
Multi-pass scanning | Exposure correction |
Magic Touch technology | Cropping and straightening |
Post-Processing Your Scanned Film Images
After scanning your film images, it’s crucial to post-process them to enhance their quality and ensure they convey the intended message to your audience. Here are some tips and techniques for post-processing your scanned film images:
- Adjustment techniques: Adjust the brightness, contrast, and levels of your scanned images to bring out details and improve their overall appearance. You can also adjust the color balance and saturation to correct any color shifts that may have occurred during scanning.
- Color correction: Color correction is an important step in post-processing your scanned film images. You can use tools such as the color balance, hue/saturation, and selective color adjustment layers to correct any color casts and ensure accurate colors.
- Sharpening methods: Scanned images can often appear soft or lacking in detail. To sharpen your images, you can use the unsharp mask filter or the high-pass filter in Photoshop. Be careful not to over-sharpen your images, as this can introduce unwanted artifacts and noise.
- Noise reduction: Scanning film can introduce noise and grain into your images. To reduce noise, you can use tools such as the noise reduction filter in Photoshop or specialized noise reduction software. Be careful not to overdo it, as this can result in loss of detail and a plastic-like appearance.
- Cropping and resizing: Finally, cropping and resizing your images can help improve their composition and make them more suitable for different uses. Be sure to maintain the aspect ratio of your images to avoid distortion, and use the appropriate resolution for the intended use (e.g. print or web).
With these techniques, you can take your scanned film images to the next level and create stunning digital versions of your analog originals.
Final Thoughts on Film Scanning and Digitization
So you’ve learned all about the different types of scanners and post-processing techniques, but what are some final thoughts to keep in mind when it comes to digitizing your film? First and foremost, it’s important to consider film preservation methods. Even though you now have digital copies of your film, it’s still important to properly store and care for the original physical copies. This includes keeping them in a cool, dry place away from direct sunlight and potential damage.
Another aspect to consider is digital restoration techniques. While scanning your film can provide a digital backup, it’s possible that the physical film may still have imperfections such as scratches or dust. Film scanning software can often help with these issues, but there are also professional services available that specialize in digital restoration. It’s important to weigh the cost and time investment of DIY film scanning and digital restoration versus outsourcing to professionals.
When it comes to scanning film negatives at home, it’s important to take your time and follow instructions carefully. While there are plenty of tutorials and guides available online, it’s important to remember that every film scanner is different and requires specific settings and techniques. Additionally, it’s important to invest in quality equipment such as a light table and macro lens to ensure the best possible results.
Overall, film scanning and digitization can be a rewarding process that allows you to preserve and share memories from your past. By considering film preservation methods, digital restoration techniques, and investing in quality equipment and software, you can ensure the best possible results. Whether you choose to DIY or outsource to professionals, the end goal is to create a digital archive of your film that can be enjoyed for years to come.