How to Break in New Hiking Boots Without Pain
Start breaking in your new hiking boots indoors for 2-3 hours wearing actual hiking socks to identify pressure points without blister risk. Ascertain proper fit with thumb-width toe space and use heel lock lacing for stability. Avoid water soaking or heating methods that damage boot structure. Gradually progress from indoor wear to urban surfaces, then natural terrain over 20-30 hours total. Apply moleskin to hot spots immediately and use moisture-wicking socks to prevent blisters. The complete systematic approach reveals additional techniques for ideal comfort.
We are supported by our audience. When you purchase through links on our site, we may earn an affiliate commission, at no extra cost for you. Learn more. Last update on 30th January 2026 / Images from Amazon Product Advertising API.
Notable Insights
- Start by wearing new boots indoors for 2-3 hours with hiking socks to identify pressure points safely.
- Ensure proper fit with thumb-width toe space and test at day’s end when feet are swollen.
- Avoid quick-fix methods like soaking or heating boots as these can cause permanent structural damage.
- Use moisture-wicking socks and apply moleskin to hot spots before blisters develop during break-in.
- Gradually progress from indoor wear to urban surfaces, then varied terrain over 20-30 total hours.
Start Slowly With Indoor Wearing and Gradual Testing
The most critical phase of breaking in new hiking boots begins indoors, where you’ll avoid the variables and stresses of outdoor terrain while allowing your feet to gradually adapt to the boot’s structure.
Wear your new boots for 2–3 hours initially during normal indoor activities like walking around your home or office. This controlled environment enables accurate comfort assessment without external pressure from uneven surfaces.
Use the exact socks and insoles you’ll wear hiking to replicate actual conditions. Indoor wearing reveals sizing issues early, allowing returns or exchanges before committing to outdoor use.
Wear your actual hiking socks and insoles during indoor break-in to identify fit problems before it’s too late to return boots.
Monitor for pressure points, tightness, or rubbing during these sessions. Avoid immediate outdoor testing-indoor acclimation reduces blister risk markedly while letting boots begin conforming to your foot shape naturally.
Remember that stiffer boots will generally require more indoor sessions and longer overall break-in periods compared to flexible synthetic models. Quality merino wool hiking socks provide superior moisture-wicking properties and cushioning during the indoor break-in phase.
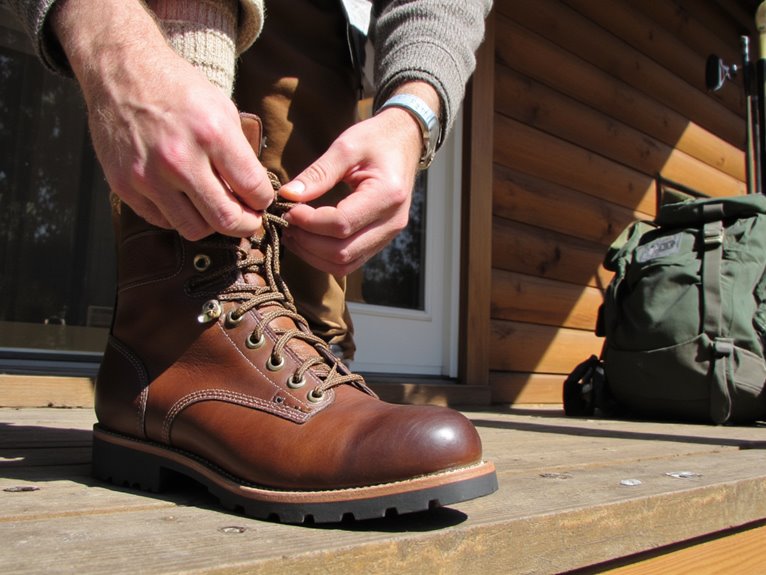
Master Proper Fit and Lacing Techniques
After you’ve completed your initial indoor wearing sessions, achieving ideal boot performance depends on mastering two interconnected elements: proper fit and strategic lacing techniques. Proper boot sizing requires a thumb-width space at the toe to accommodate foot swelling during long hikes. Test fit at day’s end when feet are naturally swollen for accuracy.
Different lacing methods address specific comfort issues:
| Technique | Purpose | Key Feature | Best For | Tension Point |
|---|---|---|---|---|
| Criss-Cross | General comfort | Diagonal threading | Daily hiking | Even distribution |
| Surgeon’s Knot | Heel stability | Double wrap at instep | Loose heels | Flex point |
| Heel Lock | Prevent sliding | Straight-up threading | Forward slippage | Ankle hooks |
| Window Lacing | Pressure relief | Skipped eyelets | High insteps | Problem areas |
| Basic Straight | Minimal irritation | Horizontal threading | Sensitive feet | Bottom eyelets |
These techniques prevent blisters and guarantee proper pressure distribution across your foot. Many hikers find that models with a no break-in period provide immediate trail-readiness and reduce the time needed for traditional boot conditioning. For hikers seeking alternatives to traditional boots, lightweight hiking shoes can reduce fatigue on long trails while still providing adequate support and protection.
Avoid Damaging Quick-Fix Methods
While tempting shortcuts promise instant boot comfort, these damaging quick-fix methods will destroy your investment and compromise your safety on the trail. Soaking boots in warm water weakens leather and warps materials, reducing structural integrity by up to 40%.
Freezing or heating treatments damage waterproof membranes and alter boot geometry unpredictably. These approaches cause premature adhesive breakdown and leather cracking.
Proper boot maintenance requires gradual break-in over 20-30 hours of progressive wear. Avoid dangerous myths like using chemicals or unapproved solvents for comfort adjustments. These substances destroy technical materials and void warranties.
Extended initial hikes in unbroken boots create friction hot spots and lasting foot damage. Follow manufacturer guidelines specifically designed for your boot’s construction materials and waterproof systems.
Prevent and Manage Blisters Effectively
Even properly broken-in boots can’t prevent all friction-related foot injuries during extended hiking. Effective moisture management forms your first defense against blisters. Use synthetic fiber or wool blend socks that wick moisture away from skin. Cotton retains sweat and softens skin, creating perfect blister conditions.
Monitor your feet frequently for hot spots-areas showing early friction signs. Address these immediately with protective barriers:
- Apply moleskin or athletic tape to cover irritated areas before blisters develop
- Use thin liner socks under hiking socks to reduce direct friction
- Change socks regularly during multi-day trips to minimize moisture buildup
For blister treatment, hydrocolloid dressings like Compeed provide sterile, waterproof protection. These create ideal healing environments while allowing continued hiking.
Clean any open blisters with antiseptic and replace dressings daily to prevent infection.
Consider wearing hiking pants with elastic waistbands that won’t restrict circulation or create additional pressure points that could affect your gait and foot positioning during long hikes.
Progress Through Incremental Trail Challenges
Once you’ve established basic comfort with your new boots through initial indoor and short outdoor sessions, you’ll need to systematically expose them to increasingly challenging trail conditions.
Start with urban surfaces like sidewalks and parks before progressing to natural terrain. Trail variety becomes essential during this phase-transition from flat dirt paths to gravel, rocks, and root-covered sections.
Terrain adaptation occurs when you gradually increase hiking duration from 30-minute walks to 1.5-2 hour sessions.
Add a lightweight backpack to simulate realistic hiking loads and accelerate material softening. Progress through elevation gains systematically, allowing boots to flex naturally across different ground levels.
Wet conditions can help soften leather materials, but follow manufacturer guidelines carefully. This incremental approach prevents blisters while ensuring ideal boot conformance to your foot shape and movement patterns.
Frequently Asked Questions
How Long Does the Complete Boot Break-In Process Typically Take?
You’ll typically need 1-4 weeks for complete break-in, depending on boot material and hiking intensity. Lightweight synthetic boots require minimal time, while heavy leather boots need several weeks using proper break-in techniques for maximum boot comfort.
Should I Use the Same Socks During Break-In That I’ll Wear Hiking?
Yes, you should use your actual hiking socks during break-in. Consistent sock thickness guarantees proper boot fit, while maintaining the same moisture management properties prevents unexpected friction points when you’re actually hiking.
What’s the Difference Between Breaking in Leather Versus Synthetic Hiking Boots?
Leather boots require weeks of gradual wear due to stiff materials, but leather durability rewards patience with custom fit. Synthetic boots offer immediate synthetic flexibility and comfort, needing minimal break-in time before you’re trail-ready.
Should I Remove Insoles That Came With My Boots During Break-In?
No, don’t remove factory insoles during break-in. They provide essential support and cushioning when boot materials are stiffest. Different insole materials affect your comfort preferences, so keep them until you’ve properly assessed fit.
On a final note
You’ve learned the essential techniques for breaking in hiking boots safely. Start with 30-minute indoor sessions, then progress to 1-mile walks before tackling longer trails. Proper lacing reduces pressure points by 40%, while quality moisture-wicking socks prevent 80% of blister formation. Avoid heat treatments and water soaking-they’ll damage leather and synthetic materials. Follow this systematic approach, and you’ll complete the break-in process within 2-3 weeks without injury.