Night Navigation: Tips for Moving, Finding Campsites, and Red Light Use
You’ll need 20-30 minutes for your eyes to fully adapt to darkness before moving at a controlled pace using peripheral vision and hearing for enhanced awareness. Select campsites at least two hours before sunset, choosing stable terrain 200 feet from water sources while avoiding low-lying areas where moisture accumulates. Red light preserves night vision by not bleaching rhodopsin, making adjustable headlamps with dedicated red LED modes essential for hands-free navigation. Advanced techniques await below.
We are supported by our audience. When you purchase through links on our site, we may earn an affiliate commission, at no extra cost for you. Learn more. Last update on 18th January 2026 / Images from Amazon Product Advertising API.
Notable Insights
- Allow 20-30 minutes for eyes to adapt to darkness and move at a controlled pace using identifiable terrain features.
- Complete campsite evaluation and setup at least two hours before darkness, avoiding low-lying areas and staying 200 feet from water.
- Use red light to preserve night vision since red wavelengths don’t bleach rhodopsin, choosing adjustable brightness headlamps for hands-free operation.
- Test ground stability by pressing firmly with your boot and select dirt, sand, or rock substrates for level camping surfaces.
- Break navigation routes into short segments between distinct landmarks like ridgelines, rock formations, and natural water features for reliable guidance.
Essential Movement Techniques for Dark Conditions
When darkness falls, your navigation approach must shift from reliance on visual landmarks to systematic techniques that work in limited visibility.
Allow your eyes 20-30 minutes to fully acclimate to darkness before beginning movement. This adaptation maximizes your natural night vision capabilities.
Implement shadow movement techniques by moving at a controlled, deliberate pace. Avoid rushing, as haste leads to navigational errors in dark conditions.
Use handrailing to follow linear features like rivers or forest edges, which provide reliable directional guidance when visibility drops.
Employ sensory adaptation strategies by actively scanning with peripheral vision and hearing. Your side vision detects movement and shapes more effectively than direct sight in low light.
Break routes into short segments using easily identifiable attack points, minimizing large navigation errors through systematic progression. Maintain a mental tick list of features you encounter along your route to track progress and confirm you’re staying on course. Consistently verify your direction with compass bearings to ensure accurate positioning throughout your movement.
Selecting and Identifying Safe Campsites After Sunset
You’ll face considerably greater challenges when selecting campsites after dark, making pre-scouting during daylight hours your most critical preparation step.
Safe terrain identification becomes exponentially harder in low-light conditions, requiring you to recognize stable ground features, proper drainage patterns, and potential hazard zones before sunset.
Wildlife activity patterns and proximity to water sources demand careful evaluation since nocturnal animals follow different movement corridors than their daytime counterparts, and sound carries differently across water bodies during nighttime hours.
Pre-Select During Daylight
The most critical decision for safe nighttime camping occurs during daylight hours when you can properly evaluate potential sites.
Daylight scouting enables you to identify hazards like unstable trees, uneven ground, and drainage issues that become invisible after sunset. You’ll need at least two hours before darkness to complete proper campsite evaluation and setup.
During daylight reconnaissance, examine soil composition for tent stability. Sandy or grassy terrain provides superior comfort compared to rocky surfaces.
Check overhead for dead branches or unstable trees within falling distance. Evaluate natural wind protection from hills or dense tree stands. Confirm the site sits at least 200 feet from water sources to protect riparian zones.
Mark your selected location with bright flagging tape or GPS coordinates for easy nighttime identification. Consider using a portable fingerprint reader to secure any electronic devices containing your GPS coordinates or camping permits, ensuring only authorized users can access critical location data after dark.
Safe Terrain Features
Although darkness complicates terrain assessment, you can still identify safe camping surfaces by systematically evaluating ground conditions with proper lighting techniques.
Use your red flashlight to sweep the area in overlapping patterns, checking for rocks, holes, or debris that could damage equipment or cause injury. Test terrain stability by pressing your boot firmly into potential camping spots-solid ground won’t give way under pressure and provides secure tent stake placement.
Focus on dirt, sand, or rock substrates rather than vegetation to minimize environmental impact and facilitate level surfaces. Avoid low-lying areas where moisture accumulates, as these create uncomfortable sleeping conditions and indicate potential drainage issues.
Check for sharp objects, glass fragments, or hazardous plants by methodically scanning the ground surface before committing to any location. Consider the recommended minimum interior dimensions of 82.7″ length and 51.2″ width when evaluating potential tent placement areas to ensure adequate space for comfortable setup.
A tactical chest rig can keep essential gear organized and easily accessible while setting up camp in darkness, allowing you to focus on terrain evaluation without fumbling through scattered equipment.
Wildlife and Water Considerations
Proper water source proximity becomes critical when establishing nighttime campsites, as darkness masks potential hazards while amplifying wildlife activity around aquatic areas. Maintain 200 feet distance from water sources to guarantee wildlife safety while avoiding insect swarms and floodplain risks. This distance reduces contamination while preserving animal access routes.
| Factor | Safe Distance | Risk Mitigation |
|---|---|---|
| Water proximity | 200+ feet | Reduces insects, flooding |
| Food storage | 200 feet from tent | Prevents wildlife attraction |
| Animal paths | Avoid completely | Minimizes encounters |
| Airflow zones | Seek breezy areas | Deters mosquitoes |
Position your campsite on durable surfaces with natural windbreaks to minimize odor dispersal. Red lights preserve night vision during water collection trips while reducing wildlife disruption. Assess water levels and current changes before establishing camp, as darkness conceals rising water hazards. Consider using moisture-wicking materials for clothing and gear in humid environments near water sources to maintain comfort during extended nighttime activities. When scouting potential camping locations in low light conditions, accurate measurements of distances from water sources and hazards become essential for establishing safe perimeters around your campsite.
Red Light Benefits and Proper Usage
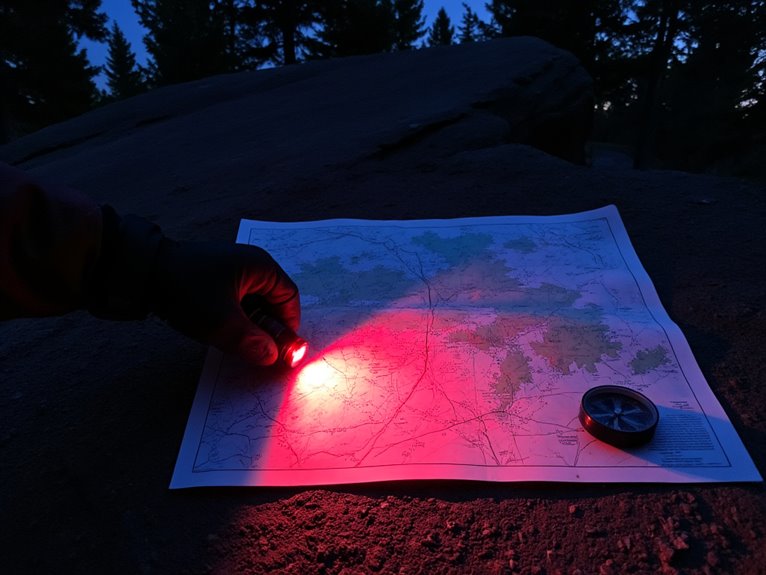
When steering in darkness, red light becomes your most valuable tool for preserving night vision while maintaining essential visibility. Red wavelengths around 650nm don’t bleach rhodopsin, the visual pigment essential for dark adaptation. This means you’ll recover night vision faster after red light exposure compared to white or blue alternatives.
Red light applications extend beyond basic illumination. You’ll minimize wildlife disturbance during nighttime activities while reducing melatonin suppression that disrupts sleep cycles. NASA and military operations rely on red lighting for these precise reasons.
- Choose adjustable red light accessories for customized brightness levels
- Use intermittent red light exposure to balance illumination with dark adaptation
- Select headlamps with dedicated red LED modes for hands-free operation
- Maintain dim settings to maximize night vision retention benefits
- Consider dual-mode flashlights combining red and white light functionality
For tactical operations requiring gear attachment, MOLLE webbing systems on backpacks and vests provide secure mounting points for red light sources and navigation equipment.
When your compass fails or gets lost, you’ll need backup navigation methods that rely on celestial references and terrain analysis.
Polaris serves as your most reliable directional anchor in the Northern Hemisphere-locate it using the Big Dipper’s pointer stars for consistent true north bearing.
You can also navigate by identifying prominent landscape features like ridgelines, valleys, and water sources, then use skylining techniques to maintain your bearing against the horizon’s silhouette.
Using Polaris for Direction
The North Star serves as nature’s most reliable compass when you’re steering without modern instruments. Polaris sits less than 1° from the north celestial pole, making it exceptionally accurate for determining true north.
Unlike other stars that move across the sky, Polaris remains fixed due to Earth’s rotational axis alignment.
Celestial navigation using Polaris requires locating the Big Dipper constellation first. The two outermost stars forming the “bowl’s” edge point directly to Polaris.
Once you’ve spotted it, face the star directly-you’re now oriented toward true north. Polaris visibility depends on clear skies and minimal light pollution.
- Locate Big Dipper’s pointer stars to find Polaris
- Face Polaris directly for true north orientation
- Works reliably in Northern Hemisphere only
- Requires clear, unobstructed northern horizon view
- Star’s altitude matches your approximate latitude
Natural Landmark Recognition
Natural landmarks provide reliable navigation reference points that remain consistent across seasons and weather conditions.
You’ll find rivers and streams particularly valuable as water landmarks since they follow predictable courses through valleys and lowlands. These features create distinct navigation corridors that prevent disorientation in unfamiliar terrain.
Identify distinctive vegetation patterns to establish your position. Large, unique trees and variations in species density signal elevation changes or proximity to water sources.
You can use moss growth on north-facing sides of trees and rocks as directional indicators. Rock formations serve as permanent visual markers easily recognizable from surrounding forest.
Combine multiple landmark types for accurate navigation. Game trails often follow ridges and watercourses, providing natural pathways through difficult terrain while confirming your directional bearing.
Skylining and Terrain Features
Moving along ridgelines and exploiting terrain features becomes essential when you can’t rely on a compass for directional guidance. Skylining techniques involve following the visible ridgeline against the sky, providing clear linear navigation without vegetation obstruction. This method maintains constant visual reference points while offering elevated vantage points for identifying distant landmarks.
Terrain navigation using handrails and baselines creates reliable directional cues. Linear features like streams or ridges serve as parallel guides, while sound cues from running water supplement visual references.
Micro-navigation techniques involve moving between distinct features-trees, rocks, or small ridges-to maintain bearing accuracy.
- Follow ridgelines for unobstructed skyline visibility and orientation
- Use streams and ridges as handrail features for directional guidance
- Navigate between distinct terrain features using micro-navigation methods
- Exploit fall lines and natural corridors for easier passage
- Combine visual and auditory terrain cues for thorough navigation
Critical Safety and Survival Strategies
Essential emergency tools include extra batteries, signal mirrors, and whistles for rescue signaling.
Position yourself in open areas, ridgelines, or clearings to maximize visibility while avoiding cliffs, depressions, steep inclines, rivers, and streams.
Signal fires and blinking lights become highly visible at night, making your location easier for rescuers to identify.
Pre-Trip Planning for Nighttime Adventures
Before you step into the darkness, thorough preparation during daylight hours determines whether your nighttime adventure becomes a successful journey or a dangerous ordeal.
Your preparation checklist must include daytime reconnaissance of the trail to memorize landmarks, elevation changes, and potential hazards. Environmental factors shift dramatically after sunset-temperatures drop 10-20°F, wildlife activity increases, and humidity rises.
Study topographic maps and download offline GPS data to your devices. Charge all electronics to 100% capacity and pack spare batteries for headlamps.
Essential pre-trip planning elements:
- Conduct daylight reconnaissance to identify key landmarks and trail features
- Download offline maps and verify GPS device functionality
- Study weather forecasts and moon phase calendars for ideal visibility
- Practice compass navigation and celestial reference techniques
- Prepare layered clothing systems for temperature fluctuations
Frequently Asked Questions
How Do I Distinguish Between Game Trails and Human-Made Paths at Night?
Look for game tracks like paw prints and hoof marks using your red light. Check path indicators including trail width, surface texture, and obstacles. Game trails are narrower with natural debris, while human paths are wider and cleared.
What Clothing Colors Are Best for Nighttime Visibility and Safety?
You’ll want fluorescent red and orange-red clothing with reflective materials for maximum nighttime safety. These vibrant hues maximize visibility in low light, while retroreflective strips guarantee you’re seen by others.
How Do I Estimate Distance Traveled When Moving Slowly in Darkness?
You’ll achieve accurate distance estimation through night pacing by counting steps between known landmarks, using timing methods with your watch, and cross-referencing with compass bearings to maintain consistent navigation.
On a final note
You’ve now mastered the core principles of nighttime navigation and camping. These techniques require practice before you’re in actual darkness. Start with short evening hikes near familiar terrain. Test your red light equipment and practice compass bearings during daylight first. Your night vision adaptation takes 20-30 minutes, so plan accordingly. Remember that preparation prevents most nighttime emergencies. Trust your skills, move deliberately, and you’ll navigate darkness safely and confidently.