River Crossing Techniques and When to Avoid Crossing
When crossing rivers, you’ll need proper footwear with 3-7mm lug depth and should unbuckle pack straps for quick release. Use the tripod method with trekking poles for solo crossings, maintaining a shoulder-width stance while facing upstream. Groups should employ triangle formations with the strongest person upstream. Avoid crossings during heavy rainfall, in turbulent or debris-filled water, or when you can’t match the current’s speed using floating debris tests. Understanding these fundamentals opens the door to mastering advanced wilderness navigation skills.
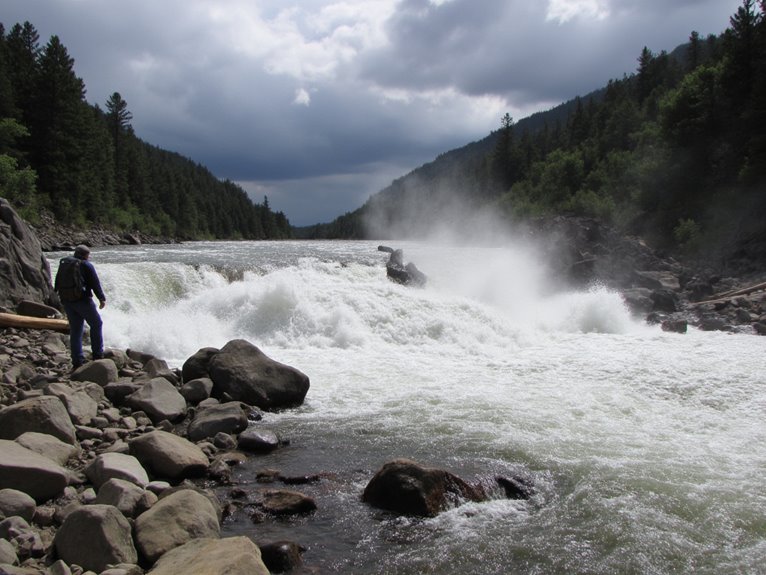
We are supported by our audience. When you purchase through links on our site, we may earn an affiliate commission, at no extra cost for you. Learn more. Last update on 18th January 2026 / Images from Amazon Product Advertising API.
Notable Insights
- Use the tripod method with trekking poles, maintaining shoulder-width stance while facing upstream and taking deliberate shuffle steps.
- Form triangle or wedge formations for group crossings, with the strongest person upstream and coordinated one-person-at-a-time movement.
- Avoid crossing during heavy rainfall, flash flood conditions, or when water contains visible debris and turbulent flows.
- Never cross unfamiliar waters without scouting, especially when downstream rescue points are absent or water clarity is poor.
- Keep backpack straps unbuckled, wear sturdy footwear with good traction, and test water depth before each step.
Essential Safety Preparations Before Entering the Water
Before attempting any river crossing, you must conduct a thorough assessment of the water conditions and crossing site to minimize risk.
Select straight sections between bends where currents remain predictable and escape routes exist downstream. Test current speed by observing floating debris-if you can’t match the pace of sticks or leaves, don’t cross.
Your essential gear preparation starts with keeping footwear on for traction and foot protection. Waterproof hiking shoes with 3-7mm lug depth provide optimal traction on slippery river surfaces and rocky terrain.
Keep your boots on during river crossings-bare feet offer no protection against sharp rocks and provide zero traction on slippery surfaces.
Undo all hip and sternum straps on your backpack for quick removal if swept away. Pack critical items in watertight bags to maintain buoyancy. Attach a bear rope coil for emergency retrieval. Use trekking poles to create additional contact points with the riverbed.
Choose slower, deeper areas rather than shallow sections with fast-moving water for enhanced safety during your crossing.
These safety reminders aren’t optional-they’re your lifeline when conditions deteriorate unexpectedly. Water deeper than thigh height significantly increases your risk of being knocked over by the current.
Solo Crossing Methods for Individual Hikers
When crossing solo, you’ll rely on the tripod method to maintain stability against moving water. This technique uses trekking poles or sturdy sticks to create three contact points with the riverbed. Keep both feet and your pole planted simultaneously while taking deliberate shuffle steps. Face upstream to brace against current flow, maintaining a shoulder-width stance throughout the crossing.
Effective solo crossing strategies require constant bottom contact and methodical movement. Test water depth ahead with your pole before each step. Avoid lifting poles from water to prevent balance-disrupting swings.
Essential balancing techniques include:
- Side-shuffle stepping with wide footing placement
- Upstream-facing body position for current resistance
- Continuous pole contact for substrate testing
Keep your pack’s hip and sternum straps undone for quick removal if needed.
Group Crossing Strategies for Multiple People
When you’re crossing rivers with multiple people, you’ll need to choose formation strategies based on your group size and the water conditions you’re facing.
The triangle formation works best for three-person teams, while the line astern technique handles four people effectively in moderate currents.
For larger groups of five or more, you’ll want to use the wedge formation, which positions your strongest members at strategic points to break the current and protect weaker team members.
Triangle Formation Method
Although individual river crossings work well in gentle currents, the Triangle Formation Method provides superior stability when you’re facing stronger flows with two companions.
This technique creates triangle stability through three-point contact, with the strongest person positioned upstream to break the current. The remaining two members face downstream, linking arms or holding waists to form a tripod-like support system.
Group dynamics require coordinated movement-only one person moves while two remain planted. The leader calls out each step to synchronize actions and maintain collective balance.
Key safety considerations include:
- Unbuckle all pack straps for quick release if swept downstream
- Limit water depth to waist level maximum for safe navigation
- Take small, deliberate steps with secure footing before advancing
This method excels in moderate to strong currents where individual crossing becomes hazardous.
Line Astern Technique
Three or more people can form a Line Astern formation by standing single-file and facing upstream into the current. The strongest person leads, breaking the water’s force while others hold the waist or hips of the person ahead. This creates mutual stabilization as you move slowly across the riverbed.
Line astern advantages include collective support that distributes current force among group members. The lead person creates an eddy effect, reducing water pressure for followers. Multiple people can use poles for enhanced stability during coordinated movement.
Line astern limitations require strong leadership and synchronized timing. Groups exceeding ideal size increase exposure risk. The technique fails in waist-deep water with strong currents or when suitable poles aren’t available for balance support.
Large Group Wedge
While line astern formations work well for smaller groups, larger parties of six or more people need a different approach that can handle increased coordination challenges and distribute water force more effectively.
The large group wedge creates superior formation dynamics by positioning your strongest members at the apex to break current flow. This V-shaped arrangement generates an eddy behind the lead person, providing calmer water for following team members.
Wedge advantages include distributed water resistance across multiple people and enhanced stability through mutual support systems. Members link arms or hold pack straps while moving deliberately with coordinated timing.
- Position strongest members at apex with descending strength along wedge arms
- Maintain communication through designated leader calling movement commands
- Use trekking poles and keep backpack straps unbuckled for safety
Choosing the Right Location for Safe Passage
Finding the ideal river crossing location requires systematic evaluation of multiple terrain and water flow factors that directly impact your safety and success.
Begin your site evaluation by walking upstream and downstream to identify crossing landmarks like straight sections, wide channels, or braided areas. These features typically offer slower currents and more predictable flow patterns compared to narrow constrictions.
Prioritize straight stretches between bends where water disperses across wider channels. Braided sections with islands or sandbars further reduce flow velocity by splitting water volume.
Wider channels and braided sections with islands naturally slow water flow, creating safer crossing conditions than narrow, concentrated currents.
Always assess downstream hazards before committing-scan for waterfalls, rapids, strainers, and undercut banks that could trap you if swept away.
Test water depth using poles or sticks. Moderate-depth water with manageable current often proves safer than shallow, fast-moving sections that create destabilizing turbulence.
Environmental Conditions That Signal Danger
Once you’ve identified a potential crossing location, recognizing environmental danger signals becomes critical for preventing accidents and fatalities. Water clarity serves as a primary hazard indicator-glacial silt and muddy conditions hide unstable stream beds and large loose rocks beneath the surface.
Rapidly changing water levels signal immediate danger, whether from upstream dam releases, sudden storms, or afternoon snowmelt peaks. Recent rainfall dramatically increases flow velocity and depth within hours.
Key environmental hazard indicators include:
- Debris accumulation – logs, branches, and sediment create strainers and unpredictable flow patterns
- Turbulent or discolored water – indicates upstream disturbances and potential flash flood conditions
- Absence of downstream rescue points – eliminates safety options if crossing attempts fail
Monitor weather patterns and understand local hydrology before attempting any river crossing.
Equipment and Planning for Successful Crossings
Proper equipment selection and thorough planning determine whether your river crossing succeeds or becomes a life-threatening emergency. Your river footwear forms the foundation of safe crossings.
Choose sturdy sandals with non-slip soles and secure ankle straps like Tevas, Keens, or Chacos. Avoid waders entirely-they trap water and increase drowning risk. Pair footwear with wool or synthetic socks that insulate when wet.
Sturdy sandals with non-slip soles and secure straps prevent dangerous water entrapment while maintaining essential foot protection during river crossings.
Gear organization prevents equipment loss during crossings. Pack essential items in waterproof storage within a small daypack or fanny pack. Trekking poles provide vital stability and depth testing capability.
Scout crossing points beforehand, identifying the shallowest, slowest water sections. Factor seasonal water levels and recent weather into your assessment. Plan crossings during ideal conditions-calm water and good visibility.
Assign experienced individuals to lead group crossings and assist weaker members.
Frequently Asked Questions
What Should I Do if I Fall Into the Water During Crossing?
Stay calm for effective water recovery – float on your back with feet downstream, swim diagonally toward shore using the current. Seek emotional support afterward, as traumatic water incidents can impact mental well-being considerably.
How Do I Help Someone Who Gets Swept Away by Current?
Don’t enter the water yourself. Use throw bag rescue techniques to toss a rope to them. Call emergency services immediately. Keep visual contact and use proper safety equipment to avoid becoming a second victim.
What Are Signs of Hypothermia After an Accidental River Fall?
You’ll notice intense shivering symptoms as your body tries generating heat, plus confusion signs like slurred speech and disorientation. Watch for pale skin, weak pulse, shallow breathing, and loss of coordination requiring immediate medical attention.
Should I Remove Wet Clothes Immediately After Crossing in Cold Weather?
Yes, you should remove wet clothing immediately after crossing in cold weather. Wet clothes draw body heat away 25 times faster than dry ones, rapidly increasing hypothermia risk and compromising your body’s temperature regulation.
How Long Should I Wait After Heavy Rain Before Attempting Crossing?
Wait several hours to days after heavy rain, depending on watershed size and terrain. You’ll need to assess river conditions carefully, monitoring water levels and current speed as essential safety measures before attempting any crossing.
On a final note
You’ve learned the critical techniques for safe river crossings and the warning signs that demand retreat. Your survival depends on proper preparation, equipment selection, and honest assessment of conditions. Don’t let overconfidence override safety protocols. Water temperature below 50°F, current speeds exceeding 3 mph, and water depths above mid-thigh create deadly combinations. Turn back when conditions deteriorate. Your best crossing technique won’t save you from poor judgment.